Categories
World War 1

Aníbal Augusto Milhais: The Portuguese Soldier ‘Worth a Million Men’

The story of Aníbal Augustus Milhais, also known by the nickname Soldado Milhões (“Soldier Millions”), reads like something out of Star Wars. A simple farmer is called to serve his country during the First World War, and he shows unparalleled bravery, despite the harshest of conditions. After becoming a national hero, he returns to living what many would view as a simple life.

This is Milhais’ story.

Aníbal Augustus Milhais’ upbringing and the start of World War I

Born in 1895, Aníbal Augustus Milhais was a farmer from the Portuguese town of Valongo de Milhais. In 1915, not long after the First World War broke out, he was drafted into the Portuguese military as part of the Infantry of Bragança. He later became a member of the Trás os Montes Brigade of the 2nd Infantry Division of the Portuguese Expeditionary Corps.

German soldiers sitting in a trench
German soldiers sitting in a trench during a battle in Flanders, Belgium. (Photo Credit: Paul Thompson / FPG / Getty Images)

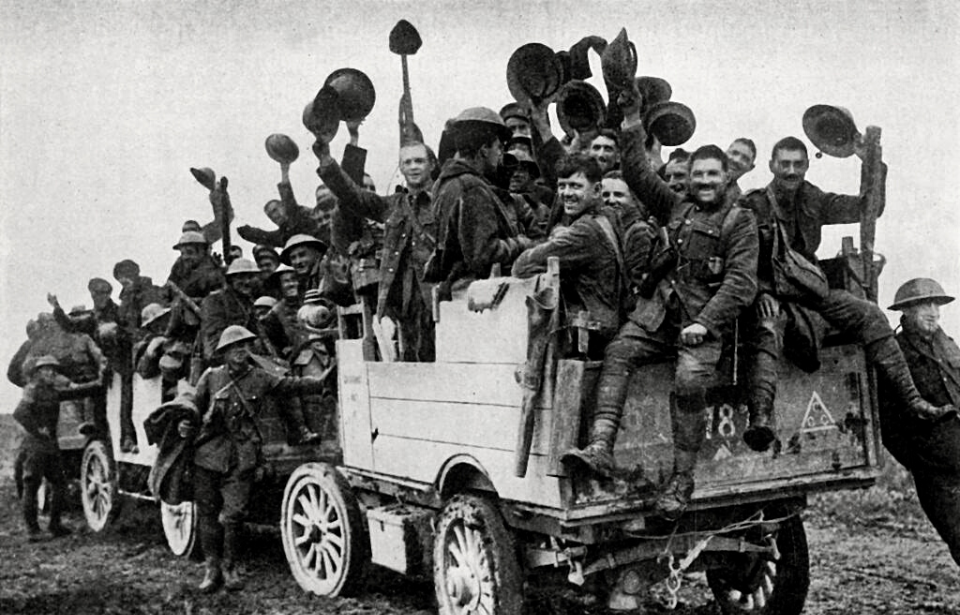
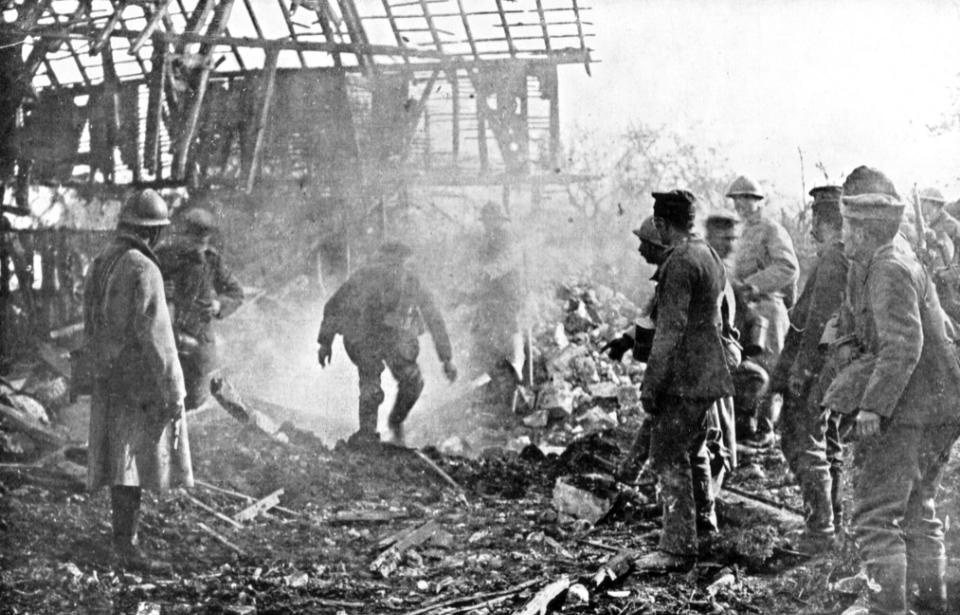
During the First World War, the Portuguese military spent the majority if its time participating in raids in Flanders, Belgium. These raids against German troops were extremely dangerous, with high casualty rates on both sides.  Milhais’ group was often assigned to serve on the frontlines during battle, meaning Milhais had the most dangerous job in an already extremely dangerous war. Soldiers serving on the frontlines were often beset with extreme fatigue.

The Battles of the Lys

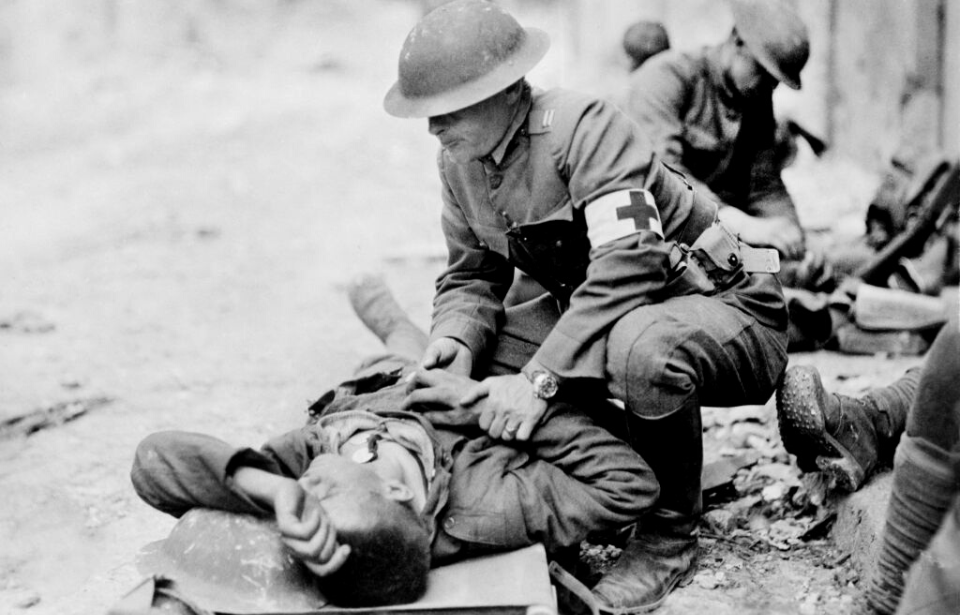
On April 9, 1918, Aníbal Augustus Milhais took part in the Battle of the Lys. During the battle, he was placed in charge of a Lewis gun, a light machine gun capable of firing a large number of rounds. The fighting went poorly, causing the Portuguese and allied Scottish troops to retreat.

Milhais was charged with laying down suppressive fire to protect the retreating troops from the Germans. While under heavy attack, he managed to kill a large amount of enemy soldiers, allowing many of his comrades to escape. Milhais stayed at his post until he ran out of ammunition and found he was all alone. He covered himself under a tarp and evaded capture as the German Army passed him by.

The ordeal was not over yet

Just because Aníbal Augustus Milhais was not captured or killed by the Germans did not mean his ordeal was over. He was all alone, with no idea where his fellow soldiers were. Still armed with his Lewis gun, Milhais made a three-day trek through Flanders. Along the way, he rescued a Scottish major who became his walking companion, and they eventually reached their comrades.

Painting of Aníbal Augusto Milhais firing his Lewis gun
Painting depicting Aníbal Augusto Milhais firing his Lewis gun. (Photo Credit: Joseolgon / Wikimedia Commons CC BY-SA 4.0)

Amazingly, Milhais again proved his valor. Just months after the Battle of the Lys, he single-handedly laid down suppressive fire that allowed a Belgian unit to make it to a secondary trench without any fatalities.

Aníbal Augustus Milhais is rewarded for his actions

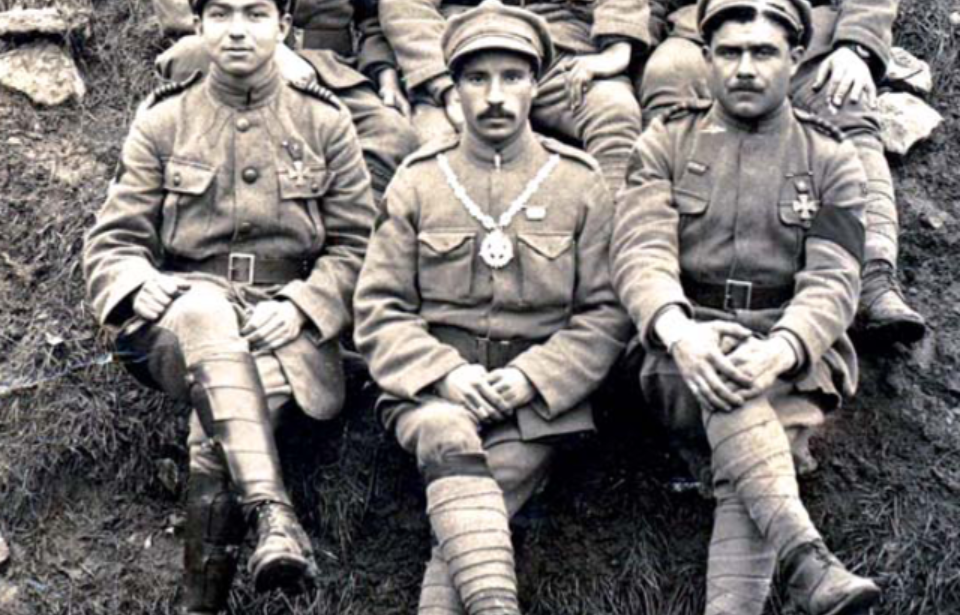
Aníbal Augustus Milhais’ actions were noticed by both British and Belgian officers, who noted his heroism in their reports. He was honored by Portuguese Major Ferreira de Amaral, who memorably stated that he was worth “one million soldiers.” For his service, he was given the Military Order of the Tower and of the Sword, of Valour, Loyalty and Merit, Portugal’s highest honor. He remains the only soldier to have received the medal on the battlefield, as opposed to during a public ceremony in Lisbon.

Anibal Augustus Milhais' Lewis gun on display
Anibal Milhais’ Lewis gun on display at the Museu Militar do Porto. (Photo Credit: Joseolgon / Wikimedia Commons CC BY-SA 4.0)

That wasn’t Milhais’ only award. France gave him the Légion d’Honneur, in front of 15,000 Allied soldiers. When he returned to Portugal, Milhais was seen as a national hero and one of the most famous people in the country.

Aníbal Augustus Milhais’ later life

After his time in the war, Aníbal Augustus Milhais returned to his village and had nine children with his wife, Teresa. Life was hard for the couple, as the Portuguese economy was severely damaged by the war, and they appealed to the government for support. Rather than supporting him monetarily, the government named his hometown, Valongo de Milhais, in his honor.

Military portrait of Aníbal Augustus Milhais
Aníbal Augustus Milhais. (Photo Credit: J. Fernandes / Wikimedia Commons / Public Domain)
The couple’s financial situation became so dire that, eventually, Milhais emigrated to Brazil to seek a better life. Once people in the country’s Portuguese community realized how dire his situation had become, they collected money to send him home and support him.
Eventually, the embarrassed Portuguese government gave their most famous soldier a pension to live on. Milhais lived out the remainder of his years in a simple fashion, and died on June 3, 1970 at the age of 74.
Categories
World War 1

German Soldiers Were Exploited By Canadian Troops During World War I

As World War I dragged on, an unexpected group became known for being ruthless. Canadians, stereotyped as friendly, kind and agreeable, certainly displayed none of these characteristics when it came to taking on their enemies. While they didn’t arrive on the Western Front until 1915, they quickly made a name for themselves as fierce opponents, despite their lack of experience. Canadian soldiers were known their bravery, and they were viewed by the Germans as a tough group to contend with.

Canadian involvement in World War I

Large crowd standing outside of Toronto City Hall
Canadians gathered outside of Toronto City Hall during a military recruitment campaign, 1915. (Photo Credit: Topical Press Agency / Getty Images)

When the First World War broke out, Canada entered the fight as a dominion of Britain. Unlike many of its allies, however, the country had a very small standing army, meaning officials needed to rapidly fill their ranks. They did so with little-to-no difficulty, as Canadians from all over the country enthusiastically signed up to fight overseas, alongside the British.

Everyone who enlisted formed the Canadian Expeditionary Force (CEF), a brand new field force that was different from the pre-existing Canadian Militia. The first group traveled to England for training, before being sent to the Western Front. The first large-scale engagement the Canadians were involved was the Second Battle of Ypres, notoriously known as the first time the Germans used poison gas on massive numbers of soldiers.

Beginning of the Canadians’ legacy

British soldiers and horses wearing gas masks
British soldiers during tests to develop better protection against gas attacks, 1917. (Photo Credit: Daily Mirror / Mirrorpix / Getty Images)

The Canadians were positioned in the Ypres Salient, with the British on the right and the French on their left. When the Germans released the first round of poison gas, the French were largely diminished, leaving the Canadian soldiers exposed. Not only were they open to the enemy, but they were also exposed to a second German gas attack two days later. Despite this, they still managed a controlled retreat while awaiting British reinforcements.

The Canadians’ earned themselves a reputation as tough and dependable in this first major engagement, which would only be further reinforced as the war went on. In addition to being solid troops, they became known as some of the most ruthless among their enemies. Although the reason for their ruthlessness isn’t known, some historians think it may have been because Canadian units were hit hardest by the unexpected gas attacks during the Second Battle of Ypres.

Canadian soldiers weren’t friendly with the German enemy

Soldiers with the 16th Canadian Machine Gun Company laying low in shell holes on a muddy battlefield
16th Canadian Machine Gun Company using shell holes as makeshift defenses at Passchendaele Ridge. (Photo Credit: William Rider-Rider / Getty Images)

The Canadians quickly became known as some of the most merciless combatants. They rarely took any prisoners of war, recalling that, if they did, the POWs would get a share of their rations. When they did capture enemy soldiers, however, they were known to have “the worst reputation for acts of violence against prisoners.”

Perhaps one of the most shocking instances of Canadian cruelty was when they were socializing with German soldiers. They would throw cans of corned beef across the trenches, and when the enemy troops yelled for more, the Canucks responded by throwing an armload of grenades at them instead.

There are other instances of Canadians being brutally excessive in their actions toward the enemy. On Christmas 1915, Canadian soldiers were fighting against the Germans when a temporary peace broke out, causing the fighting to cease. The Germans called over to wish them a Merry Christmas. Both sides put their heads above the trenches, but one of the Canadian sergeants, acting on orders not to speak with the enemy, shot two enemy soldiers.

Pioneers of the trench raid

Three Canadian soldiers sitting in a trench
Canadian soldiers resting in a trench in France, 1918. (Photo Credit: Universal History Archive / Universal Images Group / Getty Images)

Not only were Canadians known for their behavior from within their own trenches, they also became known for their dedication to trench raids, which were commonplace during WWI. They were conducted in the earliest years of the conflict by other forces, but the Canadians started conducting large scale raids when they arrived on the Western Front.

Trench raids were incredibly dangerous, as they required soldiers to come out of the cover of their trenches to cross No Man’s Land, in an attempt to gain access to enemy trenches. The goal of conducting these raids varied. They could be done to kill the enemy, destroy parts of their trench systems and fortifications, or gain important intelligence. They also served a psychological purpose, as the soldiers didn’t have to wait for an enemy shell to hit their own trench.

The Canadians quickly became experts, refining their techniques and creating their own weapons for use during the raids. Typical weapons were often not as effective, so items like clubs, knives and brass knuckles were used, as they allowed the raiders to stay silent, unlike mechanized tools.

Perfecting their skills

Crowd gathered around the Canadian War Memorial at Vimy Ridge while aircraft fly overhead
Aircraft of the Royal Air Force (RAF) and French Air Force dip their wings in salute as they fly over the Canadian War Memorial at Vimy Ridge during the dedication ceremony, 1936. (Photo Credit: Staff / Mirrorpix / Getty Images)

As they say, practice makes perfect, and the Canadians certainly honed their skills through practice. They became known as some of the most enthusiastic when it came to performing trench raids. They wore thick black gloves and would paint their faces black, so it was harder to see them as they moved stealthily toward an enemy trench.

“The Canadians transformed trench raiding to a deadly art, which wore away at the enemy’s morale and strength as he was kept taut and nervous whenever opposite the ‘wild colonials,’” said Tim Cook in a paper for the Canadian War Museum.

Despite the Canadians’ skill at trench raiding, they still suffered heavy casualties. This prompted many countries to stop the practice, as high numbers of troops were killed and those who survived didn’t want to go back. However, this didn’t stop the Canadians. In fact, they were able to use trench raids in the lead up to their most famous battle.
Leading up to the Battle of Vimy Ridge, the Canadians conducted nightly large-scale raids. These consisted of up to 900 men and were intended to kill German troops. In the four months leading up to Vimy Ridge, they led 55 nighttime trench raids against the Germans.

Real-life stormtroopers

Soldiers with the Canadian Highlanders marching through a street on a rainy day
Canadian Highlanders marching through London during the Lord Mayor’s Procession, 1915. (Photo Credit: Topical Press Agency / Getty Images)

The Canadians’ legacy in the First World War is one that’s exemplified by how they were viewed by those who fought with and against them. After facing Canadian soldiers at the Battle of the Somme, the Germans began calling them “Sturmtruppen,” or “Stormtroopers,” because of their bravery and speed in battle.

In an interview with Explorica, author and historian Dee Dauphinee explained the shift, saying, “After the war, the entire world knew what Canada had contributed to the effort.” He added, “Canada was never again thought of as a ‘Little Brother’ dominion of Britain…they had earned a seat in that little railroad car, parked outside of Versailles. And they had earned it the hard way.”

It wasn’t only the Germans using a special nickname for Canadian soldiers. By 1918, they had more than proven themselves in the field, earning the title of “shock troops” – servicemen who’d carry out hard missions and fulfill their objectives – among their allies.
Categories
World War 1

Indra Lal Roy was India’s Sole Flying Ace During World War I

World War I was the first major conflict to feature aircraft engage in aerial battles. At the time, it was incredibly dangerous to take to the skies, with about one in five British pilots dying during the conflict – and even more while training. In spite of the dangers, Indra Lal Roy flew his aircraft on various missions and became India’s first (and only) flying ace fighter pilot.

Indra Lal Roy’s early life and upbringing

Exterior of St. Paul's School covered in snow
When the First World War broke out, Indra Lal Roy was a student at St. Paul’s School in Hammersmith, England. (Photo Credit: Sir Michael Francis Joseph McDonnell / Wikimedia Commons / Public Domain)

Indra Lal Roy was born in Calcutta, India on December 2, 1898. His father was a lawyer, and the family lived on an estate called Lakhutia, which had been founded in the 17th century by their ancestor, Roop Chandra Roy.

Roy had a number of prominent relatives. His grandfather, Soorjo Coomar Goodeve Chuckerbutty, was one of the first Indian doctors to be trained in the Western style of medicine. Paresh Lal Roy, his older brother, was a soldier with the 1st Battalion, Honourable Artillery Company and is known as the “Father of Indian Boxing” for his role in popularizing the sport in India.

Indra Lal Roy was committed to fighting in the First World War

Stamp featuring an artist's rendering of Indra Lal Roy
Indra Lal Roy sold his motorcycle to ensure he could join the Royal Flying Corps. (Photo Credit: India Post, Government of India / Wikimedia Commons GODL-India)

At the outset of World War I, Indra Lal Roy was attending St. Paul’s School in Hammersmith, England. He attempted to join the Royal Flying Corps (RFC), but was turned down due to his eyesight. Undeterred, he sold his motorcycle and used the funds to seek a second opinion on his sight. He was successful in his efforts and the decision to bar him from serving was overturned.

“The Boy Who Came Back From the Dead”

Man standing at the tail end of a Royal Aircraft Factory S.E.5 biplane
During his time in the Royal Flying Corps, Indra Lal Roy flew Royal Aircraft Factory S.E.5 biplanes. (Photo Credit: Wikimedia Commons / Public Domain)

Flying for No. 56 Squadron, Indra Lal Roy was tasked with flying a Royal Aircraft Factory S.E.5a biplane. The aircraft was able to fly incredibly fast while also maintaining maneuverability. On December 6, 1917, Roy was in the air when he was shot down over France by a German fighter.

He lost consciousness after his aircraft fell to the ground. He was taken to a hospital, where he was assumed dead. However, upon being taken to the morgue, Roy shocked an attendant by knocking on the door and asking what was going on. From that day on, staff took to calling the pilot the “Boy Who Came Back From the Dead.”

Indra Lal Roy becomes a Flying Ace

Stamp featuring a photo of Indra Lal Roy
An Indian stamp commemorates Indra Lal Roy’s heroism during the First World War. (Photo Credit: India Post, Government of India / Wikimedia Commons GODL-India)

After his near-death experience, superiors wanted to prevent Indra Lal Roy from flying again. He returned to active-duty as an equipment officer, and was eventually cleared by doctors to return to the skies.

Roy went on to have a stunning streak of victories. He won his first aerial victory on July 6, 1918 by shooting down a Hannover CL.III over Drocourt. Two days later, he shot down an additional two Hannovers, as well as a German Fokker D.VII (one of the victories was shared). Additional victories included the downing of a Pflaz D.III and a DFW C.V.
Roy’s skills as a fighter pilot allowed him to become the first and only Indian Flying Ace of the First World War. Shortly after achieving the title, he was shot down by a group of German aircraft while flying over Carvin. He was just 19 years old.

Indra Lal Roy’s legacy

Indra Lal Roy's gravestone
Indra Lal Roy was laid to rest at Estevelles Communal Cemetery in Pas-de-Calais, France. (Photo Credit: Kwait59 / Wikimedia Commons CC BY-SA 4.0)

Following his death, Indra Lal Roy was championed as a hero. He was posthumously awarded the Distinguished Flying Cross, for which the citation reads, “A very gallant and determined officer, who in thirteen days accounted for nine enemy machines. In these several engagements he has displayed remarkable skill and daring, on more than one occasion accounting for two machines in one patrol.”

Roy is also recognized as a hero in his native India. Multiple commemorative stamps have been released in his honor.
Categories
World War 1

Battles of the Isonzo: Two Years, Over One Million Casualties World War 1

Many of the bloodiest battles in World War I occurred along the Western Front. There was, however, another lesser-known combat theater that was as equally brutal and bloody: the Isonzo Front. This was the site of the Battles of the Isonzo, which saw more than one million casualties over two years of fighting.

Overview of the Battles of the Isonzo

The Battles of the Isonzo were a series of 12 battles fought between the Austro-Hungarian and Italian armies along the border of what today is Slovenia. Lined with rugged peaks, the Austro-Hungarian forces had fortified the surrounding mountains before Italy officially entered the war.

Italy set its sights on Austria-Hungary following the 1915 Treaty of London, which promised the country territories belonging to the Empire. Led by Chief of Staff Luigi Cadorna, the Italians planned to seize Ljubljana. The first attack came on June 23, 1915. Despite their efforts and having more soldiers (ratio of 2:1), the Italian Army failed to secure a victory against the heavily-fortified Austro-Hungarian forces.

Italian infantrymen climbing up a rocky peak
Italian infantry during one of the Battles of the Isonzo, 1917. (Photo Credit: Photo12 / Universal Images Group / Getty Images)

Cadorna believed the best location to launch an attack was the lower end of the Isonzo River, but he also saw a potential opportunity by striking north, to avoid the mountains altogether. Following the initial attack, the Italians tried to gain ground over several other offensives, and while they managed to penetrate a few miles, the Austro-Hungarian forces inflicted heavy losses.

It was clear the only way to succeed was for the Italian Army to take out positions in the mountains. However, at the same time, they had to cross the Isonzo River if they wanted to neutralize the Austro-Hungarian defenses – a dilemma Italy’s forces would never overcome.

From August 6-17, 1916, Cadorna captured the town of Gorizia – the Italians’ first real taste of victory. Learning from a year’s worth of mistakes, they’d adapted their attacks to be short and intense targeted strikes to reduce the already overwhelming number of casualties.
Austro-Hungarian troops manning a large weapon in the snow
Austro-Hungarian heavy ordnance during the Battles of the Isonzo. (Photo Credit: ullstein bild / Getty Images)

Even with a better strategy, the next three battles throughout the autumn of 1916 were marred by the fortresses of the Austro-Hungarian-controlled mountains. As the fight for the Isonzo continued, countless resources were poured into what many could argue was a seemingly pointless conflict.

Mounting casualties

The casualties of the Battles of the Isonzo were horrific. Some 645,000 Italian soldiers were killed, accounting for roughly half of Italian military casualties throughout the First World War. The Austro-Hungarians suffered 450,000, for an overall total of around 1.2 million casualties – and that was prior to the final battle.

Austro-Hungarian soldiers laying in stretchers while medical personnel stand over them
Austro-Hungarian soldiers on their way to hospital following one of the Battles of the Isonzo, 1915. (Photo Credit: Art Media / Print Collector / Getty Images)

According to reports, the final battle, also known as the Battle of Caporetto, resulted in around 305,000 Italian casualties and 70,000 on the Austro-Hungarian side.

The first eleven Battles of the Isonzo

First Battle – June 23-July 7, 1915: Cadorna, a firm believer in the benefits of the campaign in Austria-Hungary, launched the first attack. The battle lasted 14 days, and, as aforementioned, the Italians were fought back by the Austro-Hungarians. The Italians were ultimately defeated.

Second Battle – July 18-August 3, 1915: The Italian Army captured Cappuccio Wood, as well as Mount Batognica. The battle only concluded when both sides ran out of ammunition. Later on, the Austro-Hungarian forces were able to reoccupy Cappuccio Wood.
Third Battle – October 18-November 3, 1915: The primary Italian objectives were to take two bridgeheads (Tolmin and Bovec) and, if possible, the town of Gorizia. They advanced to the Piave River, but ultimately stalled and failed to gain ground due to heavy Austro-Hungarian defenses.
Italian soldiers running through a field that's been destroyed by fighting
The Italian Army retreats during the Isonzo Campaign, 1917. (Photo Credit: Hulton Archive / Getty Images)

Fourth Battle — November 10-December 2, 1915: The Italian Second Army attempted to occupy Gorizia. They successfully captured the nearby area of Oslavia and San Floriano del Collio, but failed to take their initial target. At the same time, the Italian Third Army launched a series of attacks, but these failed to bring about any significant gains.

Fifth Battle – March 9-17, 1916: The Second and Third Italian Armies once again attempted to take Gorizia, in order to reach the Tolmin Bridgehead. Though the battle was less bloody than those previous, Gorizia still remained free of Italian control.

Sixth Battle – August 6-17, 1916: The Italians were finally able to capture Gorizia, through the use of hand-to-hand combat, along with the Oslavia-Podgora Ridge and San Michele. The offensive is considered the most successful Italian attack along the Isonzo Front and was responsible for improving troop morale.
Seventh Battle – September 14-17, 1916: The Italian Army switched from broad attacks to focused ones. Over three days, the Italian forces saw minor victories in areas surrounding the Soča River Valley, in present-day Slovenia.
German machine gunners aiming their weapon
German machine gunners defend a position during the Isonzo Campaign, 1917. (Photo Credit: Hulton Archive / Getty Images)

Eighth Battle – October 10-12, 1916: With a similar goal to the previous, this offensive saw both sides struggle to achieve victory, as heavy Italian casualties forced the battle to be called off. They suffered between 50,000 and 60,000 casualties, while the Austro-Hungarian forces saw 38,000.

Ninth Battle – November 1-4, 1916: Now positioned in the Soča River Valley, the Italian Army tried to advance further inland, but were, again, met with heavy Austro-Hungarian resistance.

Tenth Battle – May 12-June 8, 1917: By this point, Cadorna was beginning to worry about the German Army aiding the Austro-Hungarian forces. The Italians deployed 38 divisions against 14 from Austria-Hungary and began what would be a multi-week infantry advance along a 40 km front. The nearly month-long battle resulted in the Italians struggling to gain any major advances.
Eleventh Battle – August 19-September 12, 1917: By consolidating their position near Monfalcone, Italy and the Banjšice Plateau, this offensive is considered one of the few tactical victories for the Italians, who broke through the Austro-Hungarian line in two areas.

The twelfth and final Battle of the Isonzo

The twelfth Battle of the Isonzo was one of the most sweeping successes of the war. Austro-Hungarian and German forces collaborated and broke through the Italian line along the northern end of the Isonzo, surprising the enemy. By the afternoon of October 24, 1917, the Italians were exhausted and overwhelmed by the Austrian offensive attack; the troops threw down their weapons as Austrians rushed over the Isonzo River to claim Caporetto.

The Italians retreated toward the Piave River, where they established a position by the middle of November. It’s known as one of the worst losses in Italian history.

Austro-Hungarian troops looking at a large smoke cloud in the distance
Austro-Hungarian troops advance during the Isonzo Campaign, 1916. (Photo Credit: Hulton Archive / Getty Images)

At the end of the Battles of the Isonzo, both sides had suffered massive losses, with very little accomplished. The fighting triggered violent anti-war protests throughout Italy, and Cadorna was forced to resign from his role. A new Italian strategy was put in place by Gen. Armando Diaz, who transformed Italy’s role in the war. By shifting from offensive campaigns to defensive ones, the country grew to be a resourceful aid to the Allied forces for the remainder of the war.

Ernest Hemingway’s famed novel, A Farewell to Arms, was somewhat inspired by the bloody Battles of the Isonzo. The book follows the first-person account of an American lieutenant serving in the Ambulance Corps of the Italian Army. Hemingway drew from his own experiences as an ambulance driver along the Italian Front during the Great War.

Categories
World War 1

A 500-Mile March By French Cavalrymen Helped Bring an End to the First World War

Images of the First World War often capture the difficulties of trench warfare, with soldiers on all sides of the conflict engaging in a war of attrition, attacking when they were able to. Other images often exemplify the experiences of cavalrymen who are dressed in military uniform while riding in formation.

Although World War I was increasingly fought with new technology that cavalries just couldn’t keep up with, they still played an important role. One instance that demonstrates this best was when a French unit pushed for a Bulgarian surrender while helping to solidify the signing of an armistice.

Cavalry in the First World War

Despite the difficulties cavalry faced against weapons, they were used by both the Triple Entente and Central Powers throughout the First World War. Particularly on the Western Front, many served as infantrymen, as that made them more useful; their use on horseback had been diminished due to the static nature of trench warfare.

Canadian cavalrymen riding horses down a muddy hill
Canadian cavalrymen undergoing training at Shorncliffe Army Camp, October 1915. (Photo Credit: Topical Press Agency / Getty Images)

Cavalry were significantly more useful during operations in the Middle East, due to the need for highly mobile units. However, they acted more as mounted infantry, as opposed to traditional cavalry.

They were initially heavily relied on out on the Eastern Front for the same reasons, but, later in the war, many were overhauled out of a need for more infantry and horses to pull supplies and weapons. They were used for mounted combat, however, at certain points of the Balkans Campaign, which saw conflict in Serbia, Montenegro, Albania, Greece and Bulgaria.

Gen. Louis Franchet d’Espèrey

One of the men to oversee the French cavalry was experienced Gen. Louis Franchet d’Espèrey, who served in a field command position throughout the First World War. He was known for being extremely energetic and intimidating, earning himself the nickname “Desperate Frankie.” He initially served on the Western Front, before commanding the Entente forces on the Eastern Front.

Louis Francois d'Esperey holding a map while sitting at a desk
Gen. Louis François d’Espèrey, commander of the large Allied Army based at Salonika, conducted the successful Macedonian Campaign. (Photo Credit: Universal History Archive / UIG / Getty images)

The fighting during the Salonika Campaign was where he had the most military success. As soon as he arrived, he implemented a strategy organized by Gen. Adolphe Guillaumat, who’d held the position before him. Known as the Vardar Offensive, the plan consisted of a number of phases to be carried out by a combined Serbian, French and Greek force against the Bulgarians in the region.

Launching the Vardar Offensive

The Vardar Offensive was launched on September 15, 1918. The first phase involved an attack on the Bulgarian forces at Dobro Pole, while the second included attacking the Bulgarian First Army between the Vardar River and Doiran Lake.

Men leading mules down a steep flight of stairs
Allied forces landing at the Saloinka Front during the First World War. (Photo Credit: Paul Thompson / FPG / Archive Photos / Getty Images)

Lastly, d’Espèrey was tasked with marching troops through Demir Hisar, Rupel, Petrici, Blaguša, Gradec, Štip and Belessa, before taking the city of Skopje. He also planned to have troops stationed at Kastania and Tetovo to ensure the Bulgarians wouldn’t be able to flank his forces.

The plan was exceptionally effective, as the offensive only lasted until September 29, 1918.

The 500-mile cavalry charge

One of the reasons for the quick ending to the Vardar Offensive was d’Espèrey’s deployment of the French cavalry. While most of the forces were tasked with fighting along the Bulgarian line, he directly sent 3,000 cavalry troops 500 miles to Skopje. As with the others, the cavalrymen traveled through the Vardar Valley to Skopje, which was vital to the Central Powers’ communication in the Balkans.

Boats parked side-by-side to create a bridge for horses to cross
Pontoon boat bridge transporting cavalrymen over a Serbian river, 1918. (Photo Credit: Buyenlarge / Getty Images)

Despite the cavalrymen only having personal weapons and lances, they were ordered by Gen. François Jouinot-Gambetta to attack the city, which was held by 50,000 Bulgarian soldiers with machine guns and rifles. Against the odds, the French emerged victorious; this cavalry charge played a vital role in getting the Bulgarian government to sign an armistice.

Bulgarian surrender and the end of World War I

After word reached other Bulgarian forces that Skopje had fallen, they assumed it was because there were large numbers of French forces behind their lines, prompting them to surrender without a fight. Although the German troops were ordered to retake Skopje, they knew they were unlikely to be successful without the Bulgarians on their side.

Serbian military recruits standing together with firearms
Serbian military recruits during the Balkans Campaign of World War I. (Photo Credit: Paul Thompson / FPG / Archive Photos / Getty Images)
Instead of trying to take back the city, the Germans began a retreat, which cut them off from the Ottomans. It wasn’t long before the Entente led troops toward Constantinople, prompting the Ottomans to ask for an armistice, as well. The remainder of the Central Powers followed suit shortly after, bringing an end to the First World War on November 11, 1918.
Categories
World War 1

The Incredible Military Career of Graves Erskine, the US Marine Who Escorted the Unknown Soldier

When John Wayne and Republic Pictures needed a technical adviser for the 1949 film Sands of Iwo Jima, they reached out to Graves Erskine. It was a smart move, as few servicemen had a more impressive background than the US Marine.

Erskine had fought in World War I, and during the Second World War served as a commander during the Battle of Iwo Jima. However, his most noble task was set upon him in 1921, when he was chosen to bring the body of the Unknown Soldier home from Le Havre, France.

Graves Erskine’s upbringing and early life

Exterior of a building at Louisiana State University
After graduating from high school, Graves Erskine enrolled in Louisiana State University. (Photo Credit: David Pinter / Wikimedia Commons CC BY 3.0)

Graves Erskine was born in Columbia, Louisiana in 1897. He was exceptionally bright, graduating as the valedictorian of his high school class at only 15 years old. He later attended Louisiana State University, before joining the Louisiana National Guard.

Graves Erskine’s service during World War I

Artist's rendering of the Battle of Belleau Wood
Graves Erskine took part in the Battle of Belleau Wood, a legendary battle for the US Marine Corps during World War I. (Photo Credit: Wikimedia Commons / Public Domain)

In January 1918, Graves Erskine was sent to France as a platoon leader with the 6th Marine Regiment. While there was less than a year remaining in the First World War, the US Marine took part in a number of critical and high-profile battles, including the famed Battle of Belleau Wood. Occurring from June 1-26, 1918 during the German spring offensive, the battle is considered a defining moment in US Marine Corps history, cementing the service’s status as a battle-ready force.

Erskine also participated in the Battle of Château-Thierry, where he was wounded. He was also injured while fighting in the Saint-Mihiel Offensive in September 1918, in which Gen. John Pershing hoped to break through the German line and take Metz. Following this, he was sent back to the United States, where he underwent nine surgeries and spent more than a year in the hospital.

Transporting the Unknown Soldier

USS Olympia (C-6) at sea
Graves Erskine was onboard the USS Olympia (C-6) while she transported the body of the Unknown Soldier back home to the United States. (Photo Credit: US Federal Government / Wikimedia Commons / Public Domain)

In 1921, Graves Erskine was a captain onboard the USS Olympia (C-6), along with a number of other Marines. They were tasked with returning the body of an unidentified soldier – the Unknown Soldier – back to the US.

The coffin was lashed to Olympia‘s deck and Erskine had his men watch over it for four hours at a time. On the journey back, the ship encountered the Tampa Bay hurricane, one of the most intense storms in US history. Despite the turbulent seas, the men onboard Olympia did their duty by watching over the Unknown Soldier the entire trip.

Upon Olympia‘s arrival in Washington, DC, a team of Marines carried the coffin off the ship, while others saluted.

Graves Erskine’s service during World War II

US Marines raising the American flag on Iwo Jima
Graves Erskine was a commanding officer during the Battle of Iwo Jima. (Photo Credit: Staff Sergeant Louis R. Lowery, USMC / Wikimedia Commons / Public Domain)

In 1928, Graves Erskine was sent to Nicaragua with the 2nd Marine Brigade. He later served as a bodyguard for Nicaraguan President José María Moncada Tapia, the result of his work with the Nicaragua National Guard Detachment, and led a battalion in operations against bandits in northern parts of the country.

During the interwar period, Erskine rose in rank. He began the Second World War as the chief of staff for the Amphibious Force, Atlantic Fleet, and in September 1942 held the same position with the Amphibious Corps, Pacific Fleet. The following year, while serving in the Pacific, he was promoted to brigadier general and given additional duties.

Erskine was active during offensives on Tinian, Saipan and the Kwajalein Atoll, but his most notable moment of the war was his service during the Battle of Iwo Jima. Following his promotion to major general, Erskine was given command of the 3rd Marine Division, one of the many US military forces to land on Iwo Jima. Ending in a victory for the Americans, the battle, similar to that at Belleau Wood, became known as one of the Marine Corps’ most memorable fights.

Graves Erskine’s later life

Military portrait of Graves Erskine
Graves Erskine retired as one of the US Marine Corps’ most revered and experienced servicemen. (Photo Credit: Official Marine Corps Biography / Wikimedia Commons / Public Domain)

After World War II, Erskine remained in the military. His first action following the conflict was to set up programs, which would make it easier for Marines to properly transition back into civilian life. He was later called to Washington to serve as the administrator of the Retraining and Reemployment Administration (RRA).

After a few years in Washington, Erskine requested a return to active duty and was placed in charge of Marine Corps Base Camp Pendleton, California. He was also named deputy commander of Fleet Marine Force, Pacific. A few years later, in July 1951, he was promoted to the position of commanding general, Fleet Marine Force, Atlantic, where he remained until his retirement in 1953. Upon leaving the Marine Corps, he was promoted to the rank of four-star general, for his heroism in combat.
On May 21, 1973, at the age of 75, Erskine passed away in Bethesda, Maryland. He was buried at Arlington National Cemetery.
Categories
World War 1

The Battle of Cantigny Forever Changed the US Military

The Battle of Cantigny was the first great American victory of the First World War. With a military that was under-trained and ill-prepared, a win on the global stage was necessary to prove the might of the United States. Cantigny was the first time during the conflict where the US military was forced to prove itself – and it didn’t disappoint.

The United States joins World War I

US soldiers running together across a mock battlefield
Photo Credit: Topical Press Agency / Getty Images

On April 6, 1917, under President Woodrow Wilson, the US declared its entry into World War I. Unfortunately, the country’s military was ill-prepared, and it would be more than a year before American troops actually made the trek overseas.

One American division sent to Europe was the 1st Infantry Division – better known as the “Big Red One.” It featured the US Army’s best-trained men and was led by Maj. Gen. John Pershing, who was in charge of leading the fight at Cantigny, in northern France. The town was chosen because of its importance as an observational post, and he’d sent over the division to show just how strong the US military was.

It was imperative the 1st Infantry Division employ this new plan of attack with precision to ensure victory.

US troops claim Cantigny

French soldiers standing with flamethrowers among the remains of a damaged building
French troops using flamethrowers to flush Germans from their shelters in Cantigny, May 1918. (Photo Credit: The Print Collector / Print Collector / Getty Images)

The Battle of Cantigny began on May 28, 1918, at around 6:30-6:40 AM. Supported by French troops, the US, under the command of Gen. Charles P. Summerall, began a mass bombing of the German lines, creating a smoke screen for cover. French tanks then began to press forward, with the US troops using them for additional cover while they charged forward on foot.

The agreed plan of attack was to have the troops advance 110 yards every two minutes, and it worked beautifully. Within just half an hour, they’d advanced enough to employ teams with flamethrowers to clear trenches of German soldiers. Over the course of two hours, American troops displaced the Germans occupying the town, taking 100 as prisoners of war in the process (250 were taken overall during the battle), and claimed Cantigny for themselves.

This path to victory was short and sweet, but the battle certainly wasn’t over.

The Germans launch a counterattack

French troops standing around a heavy howitzer
French heavy howitzer going into position to support the American attack on Cantigny, May 1918. (Photo Credit: National Museum of the U.S. Navy / Wikimedia Commons / Public Domain)

While the Germans were removed from Cantigny, they weren’t going to let the Americans take it without a counterattack. In fact, troops attacked the US troops six times over the course of the next 72 hours.

During this time, the French troops who’d supported the American attack were sent to the Marne in response to a surprise attack launched by German Gen. Erich Lundendorff. This meant the Americans were left to defend Cantigny by themselves.

Despite their lesser training, lack of equipment and overall small numbers, the US troops were able fend off all six German counterattacks. By May 31, Allied reinforcements had arrived, and the Germans finally accepted defeat. When all was said and done, the US 1st Division had suffered 1,603 casualties, with 199 soldiers being killed in action.

The Battle of Cantigny proved many things for the US military

US troops running forward in a group during the Battle of Cantigny
US troops during the Battle of Cantigny, May 1918. (Photo Credit: Daily Herald Archive / National Science & Media Museum / SSPL / Getty Images)

When the Americans joined the war, their numbers and lack of training suggested they weren’t going to have much of an impact. As such, the Germans were prepared for the US military to either spend a long time training troops or be ill-prepared and easily defeated. What they realized after the Battle of Cantigny was that this wasn’t the case.

The US victory at Cantigny not only deprived the Germans of an important observation point in France, but proved to the rest of the world that America was a force to be reckoned with. It also showed the US could hold its own against European armies, regardless of its lack of training. It was clear that Pershing’s “team of teams” approach was an effective military strategy, and it’s largely the style that’s continued to be used by the US military today.
Categories
World War 1

Video Game Based on the Battles of the Isonzo Hits Gaming Platforms

War enthusiasts and video game fanatics will be excited to learn that the latest release in the WW1 Game Series has officially hit the market. Titled Isonzo, it’s based on the over two years of fighting that occurred between the Italians and the Austro-Hungarians along the Southern Front of the First World War.

Italian infantrymen walking up a hill
A column of Italian infantry during the Battles of the Isonzo, 1917. (Photo Credit: Photo12 / Universal Images Group / Getty Images)

Following the release of Verdun (2015) and Tannenberg (2017), Isonzo is an “offensive” game that allows players to experience first-hand the battles that occurred between the Italians and the Austro-Hungarians in the Alps and the Isonzo River valley, culminating in the deadly Battle of Caporetto.

Speaking about the game in a press release, Jos Hoebe, creative director and co-founder of the WW1 Game Series, said:

The Battles of the Isonzo occurred between June 1915 and the latter months of 1917. Consisting of 12 battles, the fighting began following the signing of the 1915 Treaty of London. It’s estimated the Italians lost 645,000 men in the first 11 battles – roughly half of the country’s casualties over the course of World War I – while the Austro-Hungarian forces suffered 450,000 casualties.

The Battle of Caporetto, which closed out the fighting between the two sides, resulted in hundreds of thousands of more casualties. The Italians suffered around 305,000, while the Austro-Hungarians pegged their losses at around 70,000. Very little was accomplished by the fighting, other than it sparking anti-war protests in Italy.
Austro-Hungarian naval members standing behind an ordnance weapon
Heavy ordnance of the Austro-Hungarian Navy ready to fire. (Photo Credit: ullstein bild / Getty Images)

Isonzo was developed by Focus Entertainment and BlackMill Games. The former hopes it and the other two games in the series will help ensure notable historic events continue to receive attention.

With Verdun, the WW1 Game Series gave gamers a taste of the brutality of trench warfare, while Tannenberg moved the fighting to the Eastern Front. The series overall has sold over two million copies through Steam, the Playstation Store and Xbox.

Still from 'Isonzo,' featuring a soldier aiming his firearm
Photo Credit: WW1 Game Series / YouTube
Isonzo was released on September 13, 2022. In celebration of its launch, the WW1 Game Series is offering a 10 percent discount to those who purchase it on Steam and Playstation. They also get access to an exclusive bonus pack, which Xbox pre-orders also received. This features two iconic uniforms (one for each side), as well as facial cosmetics “suitable for officers.”
Those wishing to download Isonzo can do so via Steam. The game is also available for Playstation 4 and 5, Xbox One and the Xbox Series X/S.
Categories
World War 1

The USS Texas (BB-35) Was Intentionally Flooded During D-Day

The USS Texas (BB-35) saw more combat action in her lifetime than most other US battleships, seeing service in both World War I and II, and combining military prowess with ingenuity to aid in the Allied success on D-Day. One outside-the-box idea by those aboard the vessel that day put the entire crew’s lives in jeopardy – thankfully, it paid off.

New York-class super-dreadnought battleships

USS New York at sea
USS New York, 1915. (Photo Credit: U.S. Navy Bureau of Ships / Wikimedia Commons / Public Domain)

The USS Texas was a New York-class battleship commissioned in March 1914, just months before the outbreak of WWI. She was the second of two ships within the class, which had been designed to be successors to the lesser-armed Wyoming-class. Considered the US Navy’s first true super dreadnoughts, both Texas and her sister vessel, USS New York (B-34), were armed to the brim.

The vessels featured a primary armament of ten 14-inch deck guns, as well as a variety of secondary firepower, including four QF 3-pounder Hotchkiss saluting guns, twenty-one 5-inch guns and two QF 1-pounder “pom-poms.” Each also sported four torpedo tubes, capable of firing the Bliss-Leavitt Mark 3 Torpedo.

Along with being equipped with a wide-array of weaponry, Texas and New York were heavily-armored, and both were powered by water-tube boilers and triple-expansion steam engines. This afforded them a top speed of just over 24 MPH and a range of around 1,825 miles.

USS Texas‘ service during World War I

US Navy sailors sitting atop the guns of the USS Texas
US Navy sailors aboard the USS Texas, 1915. (Photo Credit: Bettmann / Getty Images)

As the United States didn’t enter the First World War until April 1917, the USS Texas first got a taste of service in the aftermath of the Tampico Incident, the result of growing tensions between US Navy sailors and Mexican soldiers. She transited to Mexico just shortly after her commissioning, without a typical shakedown cruise, and remained off the coast of Veracruz for two months

After a short time conducting operations with the Atlantic Fleet, Texas returned to the coast of Veracruz. In 1916, she became the first US battleship to mount anti-aircraft guns – 3-inch guns – and the first with the ability to control gunfire using directors and rangefinders. These tools are still used today, just in a much more high-tech capacity.

Texas alternated training operations between the coasts of New England and Virginia, with winter tactical and gunnery drills in the West Indies. Upon the US entry into WWI, the battleship crossed the Atlantic Ocean to join the Grand Fleet, along the way becoming the site of the first American shots of the conflict.
While with the Grand Fleet, Texas was charged with reinforcing the British squadron tasked with blockade duty in the North Sea. She and other vessels also escorted American minelayers adding explosives to the North Sea Mine Barrage, a wide-scale minefield that ran from Norway to the Orkney Islands, off the northern coast of Scotland.

Interwar period

USS Texas and smaller boats sailing through New York Harbor
USS Texas in New York Harbor, 1918. (Photo Credit: Schenectady Museum / Hall of Electrical History Foundation / CORBIS / Getty Images)

The USS Texas returned to the US in late 1918, and after escorting US President Woodrow Wilson to the Paris Peace Conference  for the signing of the Treaty of Versailles underwent an overhaul and resumed her duties with the Atlantic Fleet.

In 1919, Texas became the first US battleship to launch an aircraft, a British-built Sopwith Camel, and served as a navigational reference and guard for the Curtiss NC-4, which became the first seaplane to conduct a trans-Atlantic flight. Shortly after, the super-dreadnought was transferred to the newly-established Pacific Fleet and given the designation BB-35.

As the interwar period progressed, Texas underwent yet another overhaul, which saw her anti-aircraft armament upgraded to include eight 3-inch guns. Her torpedo tubes were removed, and six of her 5-inch guns were moved to casemates. Following this, she was named the flagship of the US Fleet, before conducting routine operations with the Scouting Fleet.
By the outbreak of the Second World War, Texas had undergone a couple more refits and joined the US Fleet’s Training Detachment.

Operation Torch

USS Texas (BB-35) at sea
USS Texas (BB-35), 1943. (Photo Credit: Official U.S. Navy Photographer / National Archives / Wikimedia Commons / Public Domain)

When WWII began, the USS Texas operated as part of the Neutrality Patrol, before spending six months patrolling near Iceland and conducting convoy-escort missions. This was followed by Operation Torch, the Allied invasion of North Africa, during which she became one of only three US battleships to take part. The other two were the USS New York and Massachusetts (BB-59).

As part of Task Force 34.8 (TG 34.8), Texas transmitted Gen. Dwight D. Eisenhower‘s “Voice of Freedom” radio broadcast, which urged France to not oppose the Allied landings. While she wasn’t immediately involved in action against the Germans, Texas was tasked with firing upon a Vichy France ammunition dump near Port Lyautey.

After her brief stint overseas, Texas returned to the US. In April 1944, she began training for her greatest operation yet: D-Day.

USS Texas (BB-35) makes a risky decision on D-Day

Ships and barrage balloons off the coast of Omaha Beach
Allied vessels and barrage balloons off Omaha Beach, 1944. (Photo Credit: Galerie Bilderwelt / Getty Images)

After arriving in Normandy in early June 1944, the USS Texas and the British cruiser HMS Glasgow (C21) entered the Omaha Beach western fire support lane, near Pointe du Hoc. She was one of 702 ships in the US-British flotilla, and one of just seven battleships.

Texas began firing 14-inch shells in support of the 29th Infantry Division and the 2nd and 5th Ranger Battalions. Within a span of just 34 minutes, she’d fired 255 shells – a shocking comparison to the 300 the vessel had fired during the entirety of Operation Torch. Texas then shifted her focus to more inland targets as the Allies moved from the landing beaches. Just 2,700 meters from shore, the battleship continued to bombard German positions throughout June 7-8.

After briefly returning to England, Texas arrived back in Normandy on June 15. By then, the Allied forces had already pushed farther inland and out of her range; the ship’s large guns couldn’t aim high enough to launch shells where they were needed. As fire missions continued to be requested, the crew needed to think outside the box. If the port side guns couldn’t be raised any further, then the starboard side needed to be lowered.
To lower the starboard side, the crew intentionally flooded the torpedo blister, lowering Texas an extra two degrees into the water. This was just the right angle for the battleship’s guns to fire accurately and complete the mission. Most vessels would never voluntarily flood part of their hull, but this daring move embodied the spirit the Allied forces showed at Normandy, which allowed for the operation to be victorious.

What happened to the USS Texas (BB-35)?

USS Texas (BB-35) anchored at the San Jacinto Battleground State Historic Site
USS Texas (BB-35) at the San Jacinto Battleground State Historic Site, 2022. (Photo Credit: Michael Barera / Wikimedia Commons CC BY-SA 4.0)

Following the Normandy invasion, the USS Texas assisted in the Battle of Cherbourg and Operation Dragoon. The vessel was then transferred to the Pacific Theater, where she provided naval gun support during the battles of Iwo Jima and Okinawa. Earning a total of five battle stars during WWII, she was decommissioned in 1948.

Texas was the first ever US battleship to become a permanent museum ship and the first to be declared a National Historic Landmark. She is also the only remaining WWI-era dreadnought and the last capital ship to have served in both world wars.

On August 30, 2022, Texas set sail from her home at the San Jacinto Battleground State Historic Site, with her destination being the Gulf Copper & Manufacturing Corp in Galveston, where her hull will undergo a $35 million repair and upgrade. Due to her age and the amount of time she’s spent in the water, the underpart of the battleship has begun to rust and wear away, and efforts are needed to keep her afloat.
The work is expected to take between nine and 12 months to complete.
Categories
World War 1

The British Were Harvesting Soldiers’ Organs During WWI

A book by Canadian historian Tim Cook has brought to light some disturbing evidence regarding a British program that saw the harvesting of slain Canadian and British soldiers’ organs – often without their consent.

In Lifesavers and Body Snatchers: Medical Care and the Struggle for Survival in the Great War, Cook shares a sinister past that was kept in the dark for over a century. During an interview with Matthew Galloway of the CBC, the historian shared that this obscure medical program was developed “to autopsy slain Canadian and British soldiers and to remove their damaged brains, their gassed lungs, their shattered femurs.”

How was death handled during the First World War?

The fighting that occurred during World War I saw around 8.5 million soldiers killed by either disease or wounds suffered on the battlefield, with other estimates placing the total at over double that amount. Highly-mechanized artillery, mustard gas and other innovations not only made the conflict more deadly than previous ones, but also impacted how the dead were treated.

Row of crosses at the Neuville-St Vaast German Military Cemetery
Neuville-St Vaast German Military Cemetery in northern France. (Photo Credit: Ullstein Bild / Getty Images)

This sheer number of casualties had never been experienced before. Thousands of soldiers were buried on the battlefield in both mass and individual graves, often in the same spot where they died. In the early days of the war, the British Army had no register to note the burials, meaning many battlefields became filled with unmarked graves.

Those lucky enough to reach a hospital before their death were buried in a cemetery near the medical institutions, often beside cemeteries that pre-dated the war. Unlike those that occurred on the battlefield, these burials were recorded in an official register.

Austrian soldiers lying on stretchers outside of a field hospital
Wounded Austrian soldiers waiting outside of a field hospital during the Battles of Isonzo, 1915. (Photo Credit: Ann Ronan Picture Library / Photo12 / Universal Images Group / Getty Images)

There was also the issue of identifying the dead, as many were rendered unrecognizable by the manner in which they died. The landscape itself also led to confusion over casualties, as heavy rain could turn battlefields into oceans of mud; accounts from soldiers who fought during the Battle of Passchendaele describe men drowning in flooded shell craters and sinking into the mud, never to be seen again.

Organ harvesting during WWI

Tim Cook, the chief historian and director of research at the Canadian War Museum, rifled through thousands of pages of documents that had been “accidentally” misplaced or mislabeled. His research revealed that a medical program initiated by the British saw the harvesting of 799 body parts and organs from deceased Canadian and British soldiers during WWI. They were then sent to London to be studied, before being returned to Canada.

Stretcher-bearers carrying a wounded soldier through deep mud
Stretcher-bearers carrying a wounded soldier during the Battle of Pilckem Ridge, 1917. (Photo Credit: Daily Herald Archive / National Science & Media Museum / SSPL / Getty Images)

The program was intended to help teach doctors about the extreme injuries experienced on the battlefield, with the aim of saving as many lives as possible. Still, those running it described their work in incredibly morbid ways. One note Cook stumbled upon saw a doctor ask if a “brain that had been ripped apart by shrapnel” would be a good addition to their collection of specimens.

Most of the bodies used in the program were not those of unknown soldiers. In fact, Cook found lists, which featured the names of those who’d had their body parts removed. When he cross-referenced them with other records, there were no notes confirming that they had consented to the harvesting of their organs.

There weren’t even records that their next of kin was aware that their body parts had been removed. “There is no mention on their personnel file, so nobody knew about this expect for these secret files that I eventually found,” Cook said. “Their next of kin were not told that their body parts had been harvested.”
Three nursing sisters standing in uniform
Nursing sisters from the Canadian Medical Army Corps aided in life-saving efforts during the First World War. (Photo Credit: Library and Archives Canada / Wikimedia Commons / Public Domain)

Cook explained to Galloway that the lack of consent was far less egregious than it would be today, saying, “When you enlisted in the First World War in the Canadian Expeditionary Force, your body was basically owned by the military.”

Britain’s harvesting of organs during WWI was kept a secret

When WWI came to an end, how Canadians remembered the fallen didn’t line up with the harvesting of their organs. As such, the program was kept under wraps. The body parts that had been removed were preserved and sent to McGill University in Montreal, Quebec, where they were used as medical teaching aids for the next three decades, before being destroyed around 1960.

Surgeons performing a foot amputation on a patient
Foot amputation at a Canadian base hospital during the First World War. (Photo Credit: Universal History Archive / Universal Images Group / Getty Images)
While the research conducted helped save thousands of lives by properly preparing medical professionals for the horrors of war, Cook shared that learning about the morbid program affected him greatly. “To read about a private who was shot through the head and died 11 days later in agony, but before he was buried, his brain was extracted — it affected me,” he revealed.