Categories
World War 1

Schwarzlose MG: The Unusual Austro-Hungarian Machine Gun of World War I

A number of machine guns saw action during the First World War. While the Vickers, Maxim and Lewis guns are likely the ones that come to mind, there’s another that stands out simply because of how unusual its design was: the Schwarzlose MG. Developed for the Austro-Hungarian Army, this machine gun not only saw use by infantrymen, but was adapted to feature aboard ships and on aircraft, and was even installed in military fortifications.

Development of the Schwarzlose MG

Two soldiers manning a Schwarzlose MG
Schwarzlose MG being manned by soldiers stationed in the Ukrainian People’s Republic, 1918. (Photo Credit: FORTEPAN / Urbán Tamás / Wikimedia Commons CC BY-SA 3.0)

The Schwarzlose MG, also known as the Maschinengewehr M, was designed in 1904 by Prussian firearms designer Andreas Wilhelm Schwarzlose, who rose to fame for developing a blowback-operated machine gun. The weapon entered production in 1905 as the M1905, and was steadily improved upon as the years went on.

The Schwarzlose used by soldiers during World War I entered production in 1908 and was manufactured by Steyr Arms and Fegyver-és-Gépgyár (FÉG) for a decade. In 1918, active sales of the weapon ended with the close of the conflict.

Schwarzlose MG specs

Schwarzlose MG on display
Schwarzlose MG on display at a museum. (Photo Credit: OlliFoolish / Wikimedia Commons CC BY-SA 3.0)

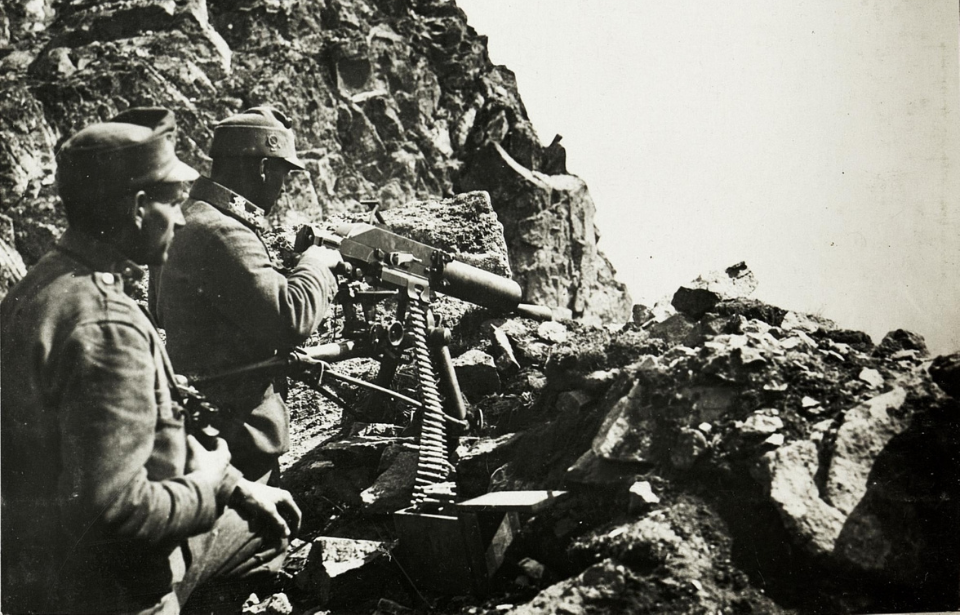
The Schwarzlose MG was a belt-fed, water-cooled machine gun that resembled those within the Maxim family. However, it was given a much simpler design and function, meaning it was inexpensive to manufacture, allowing for the necessary quantities to be produced during the First World War.

While resembling the Maxim, the Schwarzlose was unusual in that it employed a delayed blowback mechanism that utilized a single spring, as well as another that incorporated a device that oiled cartridge cases for easier extraction. The former feature allowed the chamber pressure to drop to a safe level, if the machine gun was operated correctly.

Similar to other machine guns, the Schwarzlose was heavy, weighing in at 41.4 kg. That being said, it was sturdy and reliable. It could fire between 400 and 580 RPM, with its 8 x 50 mmR Mannlicher and 8 x 56 mmR ammunition provided by a 250-round cloth belt.

Use as an infantry weapon

Three soldiers manning a Schwarzlose MG in a trench
Soldiers manning a Schwarzlose MG in a trench, 1916. (Photo Credit: Unknown Author / bildarchivaustria / Wikimedia Commons / Public Domain)

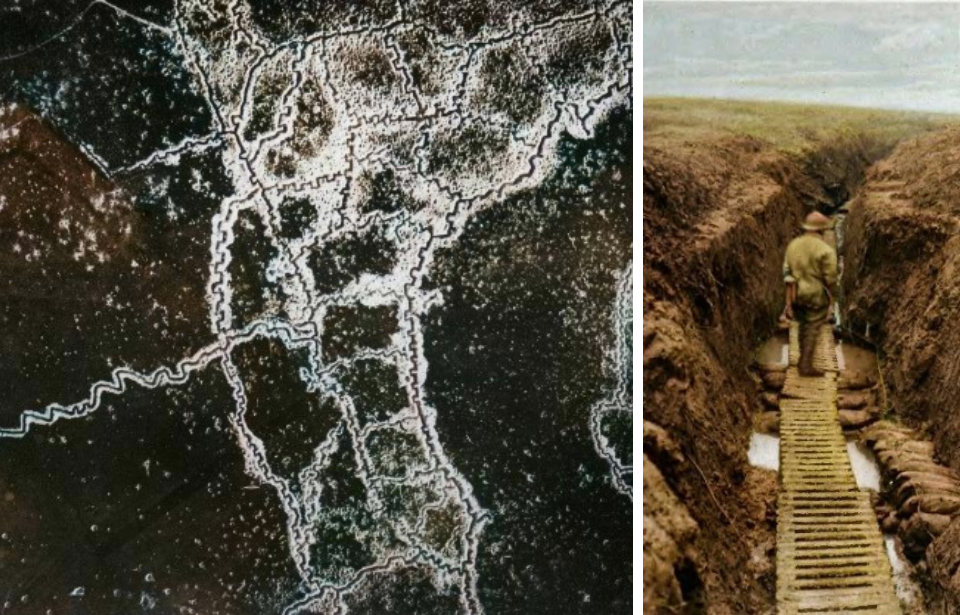
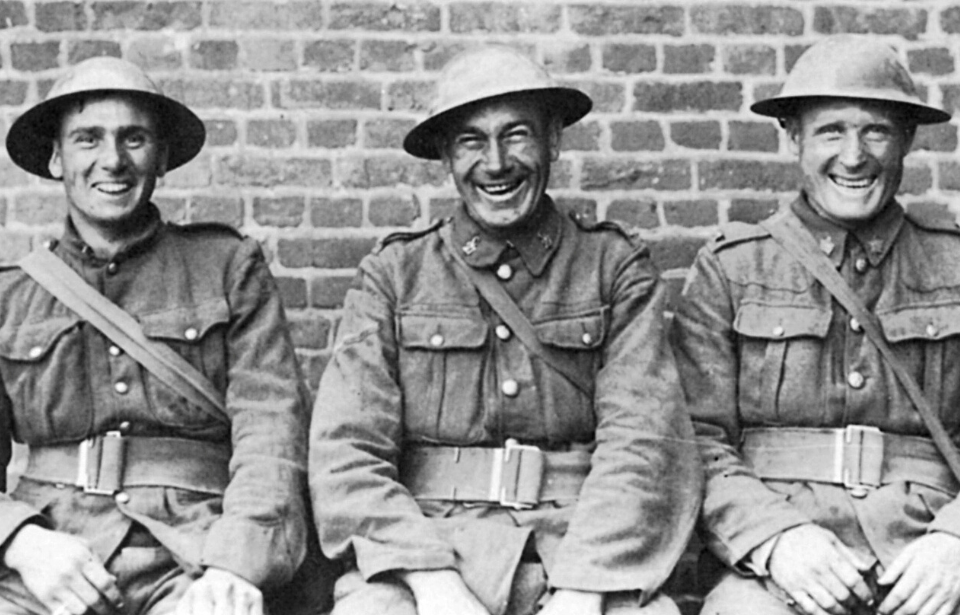
The Schwarzlose MG was developed for use by infantrymen and thus was used heavily throughout the fighting that occurred during the First World War. It served a traditional, tripod-mounted role, with a crew of three typically charged with manning it. One served as the commander, while the others were the gunner and ammunition carrier. The third would also typically act as the loader.

While serving as an infantry weapon, the Schwarzlose could also be deployed with a more-compact “backpack mount,” although it was rarely used in such a way. In this configuration, it was fitted with a backwards folding bipod that was attached to the front of the water jacket, near the muzzle.

Modifying the Schwarzlose MG for aircraft was a challenge

Five soldiers aiming a Schwarzlose MG toward the sky
Soldiers operating a Schwarzlose MG in an anti-aircraft capacity, 1915. (Photo Credit: NIMH / Dutch Ministry of Defence / Wikimedia Commons CC0 1.0)

While the Schwarzlose MG was used by infantrymen in an anti-aircraft capacity, it was actually adapted for use by aircraft flown by the Austro-Hungarian k.u.k. Luftfahrtruppe. A lighter version was necessary for this, which was ring-mounted or fixed-wing.

Right away, it was evident the Schwarzlose wasn’t developed for use by aircraft, as synchronizing it proved to be an engineering nightmare, due to the weapon’s delayed blowback mechanism. To bypass this, the fighters were equipped with large tachometers and Kravics indicators, which warned pilots of malfunctions in the synchronization gear. Attached through electrical wiring, they knew something was wrong when the Kravics’ light went out.

When initially equipped by aircraft, the Schwarzlose was largely unmodified, with its flash-hider being the only component that was removed. As WWI continued to rage on, slots were cut into the sheet metal covering the water jacket, allowing for air cooling. This feature was removed altogether in 1916, however, when the machine gun was fitted with a stronger spring and a blowback enhancer that increased its output to 880 RPM.
Additional modifications were made when the machine gun was ring-mounted, with its handles enlarged and a handgun-style trigger added. All ring-mounted Schwarzloses were also equipped with specialized sights and boxes for their ammunition belts, for more effective reloading.
Following the end of the First World War, the Schwarzlose saw limited used as an aircraft gun.

Increasing the defense of military fortifications

Two soldiers manning a Schwarzlose MG while two others stand nearby
Soldiers manning a Schwarzlose MG in the Tyrol Mountains. (Photo Credit: Unknown / Das Ende einer Armee / Fritz Weber / Wikimedia Commons / Public Domain)

Outside of its aforementioned roles, the Schwarzlose MG also saw use as a naval gun aboard sea vessels and a fortress weapon. When equipped for the latter, it could be deployed on a host of different fixed mountings.

While its use as a fortress weapon was limited during WWI, the Czechoslovakians used the Schwarzlose in this capacity during the interwar period. The country’s armed forces adapted the machine gun, tasked the Janeček Factory with production and renamed it the těžký kulomet vz. 7/24.

When Germany began to expand its sphere of power during the mid-1930s, Czechoslovakia dedicated a portion of its military budget to the construction of fortifications, some of which were partially armed with the vz. 7/24.

Issues with the Schwarzlose MG

Four soldiers manning a Schwarzlose MG, with four others lying behind them
Soldiers manning a Schwarzlose MG in the field, 1916. (Photo Credit: FORTEPAN / Urbán Tamás / Wikimedia Commons / Public Domain)

While the Schwarzlose MG was effective as an infantry weapon, it did have issues, particularly when used in ways it hadn’t been designed for, such as its aforementioned role as an aircraft gun. Outside of this, its unlocked-breech design required a shorter barrel, which, while helping to alleviate pressure, limited the machine gun’s muzzle velocity and reach. It also created a significant muzzle flash, necessitating the use of a rather large flash suppressor.

Another issue involved the Schwarzlose’s reliance on the weight of its breech block and semi-folded toggle arm. The former would unfold at a severe mechanical disadvantage, thereby slowing down the opening of the former.

Use by other nations

Two groups of soldiers manning Schwarzlose MGs
Soldiers manning Schwarzlose MGs in an anti-aircraft capacity, 1916. (Photo Credit: FORTEPAN / Urbán Tamás / Wikimedia Commons / Public Domain)

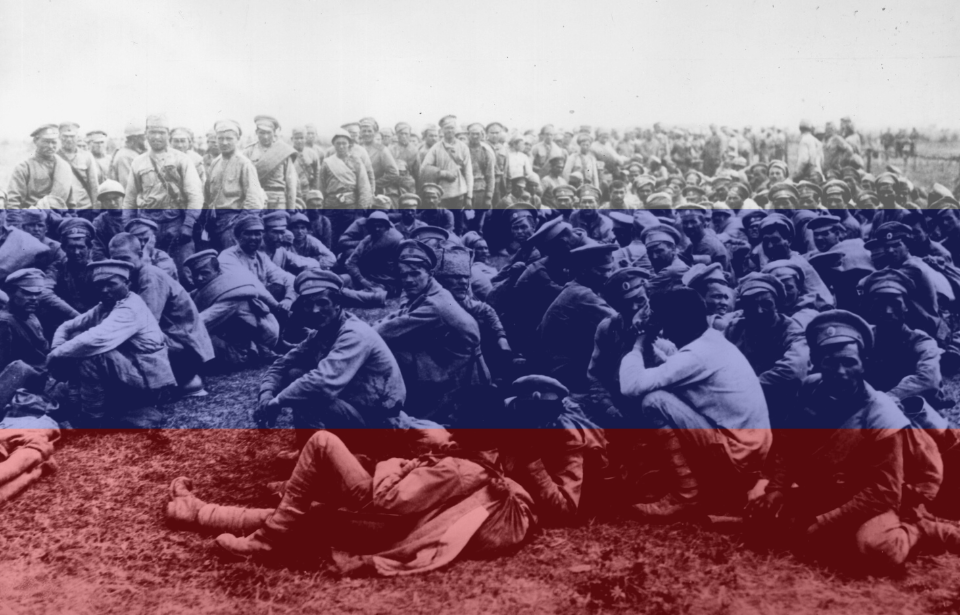
Outside of the Austro-Hungarian Empire, the Schwarzlose MG saw use by a number of nations, including Greece, the Ottoman Empire, the Netherlands, Imperial Russia and Sweden, to name a few. During the interwar period, the Polish Air Force equipped its aircraft with the machine guns, using them against the Soviets during the Polish-Soviet War, while Japan equipped the 6.5 mm Arisaka variant on its Fusō-class battleships and Kongō-class battlecruisers.

When World War II broke out, the Schwarzlose was the standard-issue machine gun for the Italian colonial forces stationed in North Africa, where it saw limited action as an anti-aircraft weapon. The German Army also used it during the final stages of the conflict, while the Swedish volunteer unit (SFK) equipped it during the Winter War.

Before it became obsolete, the Schwarzlose also saw use during the 1932-33 Colombia-Peru War, the Russian Civil War, the 1948 Arab-Israeli War, the Austro-Slovene Conflict, the Balkan Wars, the Spanish Civil War and the Austrian Civil War.

Categories
World War 1

How Trenches Changed the Face of Warfare During WWI

If there’s one thing World War I is known for, it’s the use of trenches as a means of protection and strategy. They could be seen for hundreds of miles along the Western Front, employed by soldiers positioned near the English Channel, all the way to the Swiss Alps. Various types of trenches were employed during WWI, as a way to maximize their value. That being said, they still had their pitfalls.

How trenches changed warfare over the course of WWI

German soldiers manning machine guns in a trench
German machine guns along the front near Darkehmen, East Prussia. (Photo Credit: Bettmann / Getty Images)

During WWI, trenches provided shelter for soldiers who engaged in the harsh fighting along the Western Front. They also made it difficult for the opposing forces to advance and attack the frontline. Dug under the cover of darkness, they ran eight feet deep and between four-six feet wide. Wood and/or tree posts were used to reinforce the walls and prevent collapse.

Trenches weren’t frivolously built without careful planning; there was a strategic pattern to them. They were constructed in a zig-zag formation, which allowed for the maximum amount of damage to be inflicted against the enemy, while lessening the number of casualties. Straight lines and uniform walls would have allowed for straight shots, so random turns and angled walls, known as traverses, provided quick shelter against artillery.

The expanse between each side was dubbed “No Man’s Land,” and it became the area each attempted to gain control of. As such, it was quite dangerous to cross, making the common tactic of launching infantry assaults ahead of artillery attacks particularly deadly. By the end of 1914, for example, the number of dead and injured had exceeded four million.
When the first tanks hit the Western Front toward the end of WWI, it became apparent that trench warfare had met its end, as the tracked vehicles weren’t only able to cross over the muddy expanse of No Man’s Land, they could also drive over trench openings and were invulnerable to most enemy fire.

There were three common methods to digging trenches

Men with the 15th New York Regiment aiming rifles from a trench
15th New York Regiment training for trench warfare, 1910s. (Photo Credit: Underwood Archives / Getty Images)

There were three main methods of trench-building employed during WWI. The first was known as sapping, wherein soldiers dug shallow trenches that extended into No Man’s Land from larger ones. This was the safest way to extend the systems, as shallow areas could be built by one or two soldiers and reinforced as regular trenches were extended from them. In some cases, sapping was used for rescue and retreat purposes.

Tunneling was another common form of trench-building, and it followed a similar system to sapping. Tunnels were constructed underground to provide cover from enemy fire, making them safer than regular trenches, which didn’t have overhead coverings. They were used to protect injured soldiers, and were also employed during night raids on enemy positions. Additionally, the roofs could be collapsed to create regular trenches.

Sandbagging was the third form of trench-building seen during WWI, serving as a deception tactic. While sandbags were effective at providing cover from rifle fire, they did little to protect against artillery. As such, they were stacked and covered in dirt and grass, to camouflage them and give the appearance of being underground. On occasion, they’d also be decorated to look like soldiers, so the enemy would accidentally reveal their location during an attack.

British trenches during WWI

Two British soldiers standing in a partially-flooded trench
Flooded trench along the Western Front. (Photo Credit: National Library of Scotland / Wikimedia Commons / No Restrictions)

British trenches were divided into four different types. The frontline trench, also known as the outpost line, was the closest to the enemy, located between 50 yards and one mile away. Barbed wire lined the top, providing protection for those manning them, such as sparsely-positioned machine gunners. Soldiers would spend one week in the frontline trench before retreating to the rear, alternating weekly.

The support trench was located several hundred yards away and provided support to the frontline, housing first aid stations and food preparation spots. It also served as a second line of defense, in case of the frontline trench becoming overrun. The reserve trench was even further back and served as an emergency position, should both the frontline and support trenches be taken over by the enemy.

Communication trenches connected the aforementioned types, allowing soldiers to move from the front to the rear and vice versa, sending messages and supplies wherever needed. They also served as paths across which injured soldiers were carried, removing them from immediate danger and providing a better chance of transporting them to nearby field hospitals.
Within these trenches, artillery lines could be found, as well as machine gun nests manned by two or three soldiers. Underground bunkers were also dug along them, as a means to store food, weapons and artillery. They also served as command centers, with telephone lines allowing for the transmission of information and instructions.
Extending closer toward the enemy than the frontline trench was the listening post, where tunneling was employed to create a position that stretched 30 meters under No Man’s Land. From there, soldiers equipped with stethoscopes listened to ground vibrations to determine any movement above.

Death came in many forms in the trenches

German soldiers walking through No Man's Land
German advance through No Man’s Land. (Photo Credit: Buyenlarge / Getty Images)

Despite the immediate protection trenches offered, they were also extremely dangerous – and for multiple reasons. If a trench became overrun by the enemy, soldiers could become trapped and fall victim to direct fire, as they weren’t the easiest spaces to escape from. Although the zig-zag design did reduce the possibility of such an event occurring, those who weren’t quick enough were easily caught by enemy fire.

One of the most deadly issues to stem from trenches during WWI was trench foot. Rain and shallow water tables caused flooding, and if soldiers stood in said water for too long, their feet became waterlogged, swollen and blistered. The disease could become so severe that those afflicted with it would need their foot/feet amputated to prevent the spread of infection – or even death.

To prevent trench foot and flooding, a narrow drainage channel was built into the trenches that lined the Western Front. They were covered by wooden boards known as “duck boards,” which raised the standing area and kept soldiers’ feet somewhat dry. As well, sandbags could be thrown into the bottom of trenches as a method of soaking up some of the water.
Categories
World War 1

Maurice Rose: The Highest Ranking US Officer Killed By the Enemy In Europe During WWII

Maurice Rose lived through the horrors of the First World War and bravely returned to the battlefield when the global population was plunged into conflict once more. The Jewish major general never lived to see the German surrender in 1945, but his legacy is an inspiration to servicemen and civilians alike.

Maurice Rose was born to serve

Maurice Rose looking to the side + Plaque marking Maurice Rose's birthplace
Maurice Rose, 1944 + Plaque marking the birthplace of Maurice Rose. (Photo Credit: 1. Matthewdkaufman / Wikimedia Commons / Public Domain 2. Joe Mabel / Wikimedia Commons CC BY-SA 3.0)

Maurice Rose was born on November 26, 1899 to Samuel and Katherin “Katy” Rose. Intelligent beyond his years, he grew up in Denver, Colorado. According to his high school classmates, he’d always had a dream of serving in the US military, with a cartoon in the school newspaper once depicting him carrying a rifle.

In 1916, the 17-year-old Rose lied about his age to become a private in the Colorado National Guard. He hoped to participate in the Pancho Villa Expedition. However, six weeks after his enlistment, he was discharged when his commander learned his true age.

In 1917, Rose, again, enlisted, this time with his parents’ permission. Similar to before, he lied about his age, this time to become eligible for Officer Candidate School (OCS), graduating four months after the United States entered the First World War. He was commissioned as a US Army Reserve second lieutenant of infantry and given command of a platoon with the 353rd Infantry Regiment, 89th Infantry Division.

After training at Camp Funston, Kansas, Rose was promoted to temporary first lieutenant. In late May 1918 – the final year of the war – the 89th arrived in France.

Maurice Rose’s service during World War I

Members of the 353rd Infantry Regiment, 89th Infantry Division dancing with women in the middle of a large crowd
Members of the 353rd Infantry Regiment, 89th Infantry Division celebrating with citizens in Meuse, France following the conclusion of World War I. (Photo Credit: Bettmann / Getty Images)

Maurice Rose’s division received additional training while in Europe, before taking up position near Metz, in preparation for the Meuse-Argonne Offensive. During a German artillery barrage, Rose was hit by shrapnel and wounded. Even with his injuries, which included a concussion, he refused to be evacuated. However, he was ultimately removed from the battlefield after collapsing from exhaustion.

Rose stayed with the 353rd Infantry Regiment throughout the remainder of the war, and he remained in Germany after the Armistice. He returned home in 1919, and worked as a traveling salesman until he was accepted back into active duty as a first lieutenant. A day later, he was promoted to the rank of captain and served with several regiments at Fort Douglas, Utah, before becoming the adjutant of the 38th Infantry.
Throughout the remainder of the 1920s and early 30s, Rose served as an instructor for the Reserve Officers’ Training Corps and New Mexico National Guard. He was promoted to major in 1936, and, in 1939, was posted to Fort George G. Meade, Maryland as an instructor at the Third Corps Area Command and Staff School.

Rising up the military ladder during World War II

Two M4 Sherman tanks driving along a snow-covered road
M4 Sherman tanks with the US 3rd Armored Division on a snow-covered road in Manhay, Belgium, 1945. (Photo Credit: Photo12 / UIG / Getty Images)

Maurice Rose was assigned to Fort Knox, Kentucky when the US joined the Second World War in 1941. Now a lieutenant colonel, he commanded the 3rd Battalion, 13th Armored Regiment, before being reassigned as the executive officer of the 1st Armored Brigade, 1st Armored Division. One newspaper reporter caught sight of Rose while watching the brigade training and referred to him as “probably the best-looking man in the army.”

In 1942, Rose arrived in North Africa with the 2nd Armored Division and was soon promoted to colonel. The Americans defeated the German forces in Tunisia, with Rose playing a large role in negotiating the terms of the German unconditional surrender with Generalmajor Fritz Krause.
Still with the 2nd, Rose moved up the ladder once more to become a brigadier general. He led his team in Combat Command A through Sicily, and, in 1944, succeeded Maj. Gen. Leroy H. Watson as commander of the 3rd Armored Division. Rose also earned a promotion to the rank of major general during this time.
After the success of Operation Overlord, Rose led his men to Belgium, where they became the first tank unit to enter Germany – the first in many notable accomplishments along the German front. During the Battle of the Bulge, the 3rd helped to beat back the German offensive in the Ardennes, before moving on to Cologne.

Maurice Rose’s senseless death

American flag flying over the graves at the Netherlands American Cemetery
Memorial Day service at the Netherlands American Cemetery, 1945. (Photo Credit: CORBIS / Getty Images)

While navigating a forested area outside of Paderborn in northeastern Germany on March 30, 1945, the 3rd Armored Division received reports that the units behind them were being held up by German troops. As they turned around, they were gunned down and surrounded by the SS Panzer Brigade Westfalen.

In an attempt to escape the encroaching Germans, Maurice Rose and his men turned their Jeep toward the main road, which was occupied by even more German Tiger II tanks. The driver tried to maneuver around the tanks, but one cut them off while the lead Jeep managed to escape.
Rose and his aide, Maj. Robert Bellinger, got out of the Jeep as the German tank commander opened his hatch. Approaching the armored vehicle with their arms raised, the commander aimed a machine pistol at Rose, who was reaching toward the holster on his hip. A spray of shots rang out, with 14 striking the major general, killing him on the spot.
Bellinger and the others managed to escape, and they later returned to retrieve Rose’s body. The decorated serviceman and heroic leader died within months of the war’s end. He was buried at the Netherlands American Cemetery with the distinction of being the highest-ranking American killed by enemy fire in Europe during the course of the war.
US leaders were outraged over the senseless death of such a decorated commander, and a brief investigation was opened to determine if he was the victim of a war crime. However, it was impossible to determine if Rose had been reaching for his pistol to surrender or retaliate. The German tank crew also had no idea he was a high-ranking officer. As such, the case was ultimately dismissed.
Maurice Rose was survived by his wife and two sons, both of whom were named after the career military man. Maurice “Mike” Rose followed in his father’s steps, serving in World War II, Korea and during the Vietnam War, while Maurice Roderick “Reece” Rose opted to pursue a career in law enforcement.
Categories
World War 1

John Simpson Kirkpatrick: The ‘Man with the Donkey’ in Gallipoli

Best known as the “Man with the Donkey,” John Simpson Kirkpatrick was one of many larger than life figures who landed with the ANZACs during the Gallipoli Campaign. Serving with the 3rd Australian Field Ambulance, he and his donkeys aided their comrades during the offensive, becoming almost-legendary figures by the time the First World War came to an end.

John Simpson Kirkpatrick’s early life

Richard Alexander Henderson aiding an injured soldier riding atop a donkey
For years, the man in this image was incorrectly identified as Pvt. John Simpson Kirkpatrick. In actuality, he’s Lt. Richard Alexander Henderson of the New Zealand Medical Corps. (Photo Credit: Sergeant James G. Jackson / Australian War Memorial / Wikimedia Commons / Public Domain)

John Simpson Kirkpatrick was born on July 6, 1892 in County Durham, England. He began working with donkeys as a youngster on his summer holidays, a skill that would place him in good stead in the years to come.

When he turned 16, Kirkpatrick volunteered as a gunner for the Territorial Force, before joining the British Merchant Navy in 1909. When his ship was docked in New South Wales, Australia in May 1910, he deserted his crew and took odd jobs around the country.

3rd Australian Field Ambulance

Men with the Australian 3rd Field Ambulance posing together
Australian 3rd Field Ambulance, with Pvt. John Simpson Kirkpatrick standing third from the left, October 1914. (Photo Credit: Unknown Author / Australian War Memorial / Wikimedia Commons / Public Domain)

John Simpson Kirkpatrick enlisted as a field ambulance stretcher bearer in Perth on August 23, 1914, after which he began training at Blackboy Hill Training Camp. Following this, he was assigned to the 3rd Australian Field Ambulance, regimental number 202, with whom he served for the entirety of his time overseas.

The group were sent to take part in the Gallipoli Campaign, which, at the time, was already well underway, landing at ANZAC Cove on April 25, 1915 as part of the 1st Australian Division. It didn’t take long for Kirkpatrick to get into the swing of things, carrying injured soldiers from the frontlines to receive medical attention.

It was on April 26 that he made the decision that would become the source of his fame: using a donkey to transport the wounded servicemen, instead of carrying them on a stretcher or over his shoulders. Kirkpatrick and his donkey became a common sight on the frontlines; he sang and whistled while the pair walked along the battlefield.

Duffy the donkey

John Simpson Kirkpatrick using Duffy the donkey to transport an injured soldier
Pvt. John Simpson Kirkpatrick with Duffy the donkey during the Gallipoli Campaign, 1915. (Photo Credit: J.A. O’Brien / Australian War Memorial / Wikimedia Commons / Public Domain)

Although Duffy is perhaps the best known of John Simpson Kirkpatrick’s donkeys, sources indicate he likely had multiple – or, at the very least, different nicknames for the same one: Duffy No. 1, Duffy No. 2, Murphy, Abdul and Queen Elizabeth.

“Private Simpson and his little beast earned the admiration of everyone at the upper end of the valley. They worked all day and night throughout the whole period since the landing, and the help rendered to the wounded was invaluable.
“Simpson knew no fear and moved unconcernedly amid shrapnel and rifle fire, steadily carrying out his self-imposed task day by day, and he frequently earned the applause of the personnel for his many fearless rescues of wounded men from areas subject to rifle and shrapnel fire.”

John Simpson Kirkpatrick is killed in action

John Simpson Kirkpatrick's headstone
Pvt. John Simpson Kirkpatrick’s headstone. (Photo Credit: Gsl / Wikimedia Commons CC BY-SA 3.0)

Sadly, John Simpson Kirkpatrick’s dedication to the wounded was short-lived, as he was killed in action (KIA) during the Third Attack on ANZAC Cove on May 19, 1915. He was only 22 years old.

The commanding officer of the 21st Kohat Indian Mountain Battery wrote, “[Simpson] had many donkeys and men killed beside him but led a charmed life till 19th May. We treasured his last donkey and evacuated it safely at the end with a view to presenting it to Australia but it was stolen from our mule lines in Mudros.”
Other sources say that one of Kirkpatrick’s donkeys was passed along to Lt. Richard Alexander Henderson of the New Zealand Medical Corps, a man often confused as Simpson in images from the Gallipoli Campaign.

Remembering John Simpson Kirkpatrick

Statue of John Kirkpatrick Simpson and Duffy the donkey aiding an injured soldier
Statue dedicated to John Kirkpatrick Simpson and Duffy the donkey at the Shrine of Remembrance in Melbourne, Australia. (Photo Credit: Gsl / Wikimedia Commons CC BY-SA 3.0)

Although he only served for just over three weeks, John Kirkpatrick Simpson became an almost mythical figure in the years that followed his death. He is credited with saving 300 men over his 24 days of service. Many were said to have been seriously wounded, yet it has been pointed out that only those with more minor wounds would have been able to travel on Simpson’s donkey.Those with injuries to the head or chest couldn’t have ridden down a valley, even with the assistance of the handler. Nonetheless the stories persist, and numerous memorials to the “Man with the Donkey” still exist. He has even been portrayed in films, television shows and on postage stamps.

Despite his efforts, Kirkpatrick never received the Victoria Cross he was nominated for, due to a clerical error, one which has never been remedied.
Categories
World War 1

John Simpson Kirkpatrick: The ‘Man with the Donkey’ in Gallipoli

Best known as the “Man with the Donkey,” John Simpson Kirkpatrick was one of many larger than life figures who landed with the ANZACs during the Gallipoli Campaign. Serving with the 3rd Australian Field Ambulance, he and his donkeys aided their comrades during the offensive, becoming almost-legendary figures by the time the First World War came to an end.

John Simpson Kirkpatrick’s early life

Richard Alexander Henderson aiding an injured soldier riding atop a donkey
For years, the man in this image was incorrectly identified as Pvt. John Simpson Kirkpatrick. In actuality, he’s Lt. Richard Alexander Henderson of the New Zealand Medical Corps. (Photo Credit: Sergeant James G. Jackson / Australian War Memorial / Wikimedia Commons / Public Domain)

John Simpson Kirkpatrick was born on July 6, 1892 in County Durham, England. He began working with donkeys as a youngster on his summer holidays, a skill that would place him in good stead in the years to come.

When he turned 16, Kirkpatrick volunteered as a gunner for the Territorial Force, before joining the British Merchant Navy in 1909. When his ship was docked in New South Wales, Australia in May 1910, he deserted his crew and took odd jobs around the country.

3rd Australian Field Ambulance

Men with the Australian 3rd Field Ambulance posing together
Australian 3rd Field Ambulance, with Pvt. John Simpson Kirkpatrick standing third from the left, October 1914. (Photo Credit: Unknown Author / Australian War Memorial / Wikimedia Commons / Public Domain)

John Simpson Kirkpatrick enlisted as a field ambulance stretcher bearer in Perth on August 23, 1914, after which he began training at Blackboy Hill Training Camp. Following this, he was assigned to the 3rd Australian Field Ambulance, regimental number 202, with whom he served for the entirety of his time overseas.

The group were sent to take part in the Gallipoli Campaign, which, at the time, was already well underway, landing at ANZAC Cove on April 25, 1915 as part of the 1st Australian Division. It didn’t take long for Kirkpatrick to get into the swing of things, carrying injured soldiers from the frontlines to receive medical attention.

It was on April 26 that he made the decision that would become the source of his fame: using a donkey to transport the wounded servicemen, instead of carrying them on a stretcher or over his shoulders. Kirkpatrick and his donkey became a common sight on the frontlines; he sang and whistled while the pair walked along the battlefield.

Duffy the donkey

John Simpson Kirkpatrick using Duffy the donkey to transport an injured soldier
Pvt. John Simpson Kirkpatrick with Duffy the donkey during the Gallipoli Campaign, 1915. (Photo Credit: J.A. O’Brien / Australian War Memorial / Wikimedia Commons / Public Domain)

Although Duffy is perhaps the best known of John Simpson Kirkpatrick’s donkeys, sources indicate he likely had multiple – or, at the very least, different nicknames for the same one: Duffy No. 1, Duffy No. 2, Murphy, Abdul and Queen Elizabeth.

“Private Simpson and his little beast earned the admiration of everyone at the upper end of the valley. They worked all day and night throughout the whole period since the landing, and the help rendered to the wounded was invaluable.
“Simpson knew no fear and moved unconcernedly amid shrapnel and rifle fire, steadily carrying out his self-imposed task day by day, and he frequently earned the applause of the personnel for his many fearless rescues of wounded men from areas subject to rifle and shrapnel fire.”

John Simpson Kirkpatrick is killed in action

John Simpson Kirkpatrick's headstone
Pvt. John Simpson Kirkpatrick’s headstone. (Photo Credit: Gsl / Wikimedia Commons CC BY-SA 3.0)

Sadly, John Simpson Kirkpatrick’s dedication to the wounded was short-lived, as he was killed in action (KIA) during the Third Attack on ANZAC Cove on May 19, 1915. He was only 22 years old.

The commanding officer of the 21st Kohat Indian Mountain Battery wrote, “[Simpson] had many donkeys and men killed beside him but led a charmed life till 19th May. We treasured his last donkey and evacuated it safely at the end with a view to presenting it to Australia but it was stolen from our mule lines in Mudros.”
Other sources say that one of Kirkpatrick’s donkeys was passed along to Lt. Richard Alexander Henderson of the New Zealand Medical Corps, a man often confused as Simpson in images from the Gallipoli Campaign.

Remembering John Simpson Kirkpatrick

Statue of John Kirkpatrick Simpson and Duffy the donkey aiding an injured soldier
Statue dedicated to John Kirkpatrick Simpson and Duffy the donkey at the Shrine of Remembrance in Melbourne, Australia. (Photo Credit: Gsl / Wikimedia Commons CC BY-SA 3.0)

Although he only served for just over three weeks, John Kirkpatrick Simpson became an almost mythical figure in the years that followed his death. He is credited with saving 300 men over his 24 days of service. Many were said to have been seriously wounded, yet it has been pointed out that only those with more minor wounds would have been able to travel on Simpson’s donkey.

Those with injuries to the head or chest couldn’t have ridden down a valley, even with the assistance of the handler. Nonetheless the stories persist, and numerous memorials to the “Man with the Donkey” still exist. He has even been portrayed in films, television shows and on postage stamps.

Despite his efforts, Kirkpatrick never received the Victoria Cross he was nominated for, due to a clerical error, one which has never been remedied.

Categories
World War 1

Battle of Tannenberg: Annihilation of the Russian Second Army

Five hundred years before the start of World War I, the Teutonic Knights were gravely defeated by Slavic and Lithuanian forces at the Battle of Tannenberg (otherwise known as Grunwald). In 1914, the Germans practically slaughtered the entire Russian Second Army over the course of just four days, just miles away from the site of the 1410 battle. Given this, German officials couldn’t help but name the site their historic win, “Tannenberg.”

Early days of World War I

German soldiers standing with captured Belgian artillery weapons following the Battle of Liège
Belgian artillery captured by the Germans during the Battle of Liège, 1914. (Photo Credit: Underwood Archives / Getty Images)

Germany entered the Great War following the Schlieffen Plan, influenced by Field Marshal Alfred von Schlieffen and his vision of a sweeping German invasion of France and Belgium. The plan was to gather the country’s allies, before moving toward France via the Netherlands, where they would defeat the French Third Republic. At the same time, a limited German contingent would travel toward Russia to fend off potential attacks, until the triumphant soldiers arrived to bolster their numbers.

The entire strength of the German Army in 1914 totaled 1,191 battalions, the majority of which were deployed to France while the Eighth Army of East Prussia, comprised of just 10 percent of Germany’s entire military, set their sights on Russia.

Meanwhile, France organized a speedy mobilization of its forces, followed by an immediate attack to drive back the encroaching Germans. Buying time for the British and Russians to establish their defenses, neutral Belgium was defeated after two weeks of intense fighting during the Battle of Liège – the first official battle of WWI.

Waiting for the British Expeditionary Force (BEF) and their Russian allies to join them, France knew it would take time for Russia to mobilize. The country’s limited railway network – 75 percent of Russian railways were still single-tracked – meant it took 60 days before enough divisions were in action.

Battle of Gumbinnen

Staff with the Eighth Army standing together during the Battle of Tannenberg
Eighth Army staff, 1914. (Photo Credit: Hogo Vogel / Sammelbild der Immalin-Werke / Wikimedia Commons / Public Domain)

The Eighth Army was by far the most inexperienced company in the Imperial German military. It was comprised of reservists and garrison troops, and led by Generaloberst Maximilian von Prittwitz, who was surprised to find the Russians had mobilized much faster than he’d anticipated.

von Prittwitz was replaced by two legendary military leaders: General der Infanterie Erich Ludendorff and Paul von Hindenberg, a famed field marshal who’d lead the Imperial German Army throughout the remainder of the war along the Eastern Front. Now under new leadership, the Eighth Army went into battle against the unprepared Russians with every advantage they could muster.

Was Russia doomed from the start?

German soldiers advancing through explosions during the Battle of Tannenberg
German soldiers fighting the Russian Army during the Battle of Tannenberg, 1914. (Photo Credit: Hulton Archive / Getty Images)

The lead-up to the Battle of Tannenberg likely sealed Russia’s fate before the fighting even began. The Russian Army, with little experience, made a massive mistake when it came to its radio communications. Orders were being transmitted to personnel on open radio frequencies, and even though they were encoded, the Germans easily intercepted the messages and used them to their advantage.

According to the National Security Agency (NSA), the Battle of Tannenberg was the first in human history in which the interception of enemy radio traffic played a decisive role.
One message revealed that the 1st Army Corps wasn’t pursuing the Eighth Army after all – they were, instead, turning north toward Königsberg, Prussia with the 2nd Army following close behind. The two were separated by the 50-mile chain of the Masurian Lake District, slowing their advance toward Königsberg.
Using the intercepted radio messages, Ludendorff, a military theorist, came up with a strategy to attack the 2nd Army south of the Masurian Lakes. The 2nd’s commander, General of the Cavalry Alexander Samsonov, was already hindered by a slow supply chain, poor communication and the difficulty of navigating a large force with heavy artillery through the are’s impossible terrain. Soon, he and his men found themselves completely surrounded by the Germans.
“Imagine this Russian army as a bulge pressing into Germany and the Germans strike at a point where the bulge begins and cut off the vast majority of the Russian forces in the middle,” explains military historian, Jay Lockenour. “Because of communication problems, the Russian commanders didn’t know that a major attack on their flank was underway until half a day too late.”
Samsonov’s men were spread out over a 60-mile stretch, with the center, right and left wings separated – practically inviting the Germans to attack both wings. Meanwhile, the 1st Army Corps, led by General of the Cavalry Paul von Rennenkampf, was in no rush to come to the 2nd’s aid. Instead, a lapse in communication failed to urge him to pick up the pace and change his focus from Königsberg to the Masurian Lakes.
On August 26, 1914, Ludendorff ordered General der Infanterie Hermann von François and his I Corps to attack and break through the Russians’ left wing.

Who won the Battle of Tannenberg?

Categories
World War 1

Tommies: Did the Endearing Term for British Soldiers Actually Originate During WWI?

The term “Tommies” is most closely associated with British soldiers who served during the First World War. However, where and how did the nickname originate? It’s a topic of debate among historians, who also question whether a serviceman named Tommy Atkins ever really existed.

Paying respects to British war veterans

Convoy of British soldiers driving down a street
British soldiers on their way to the front, October 1939. (Photo Credit: Fox Photos / Getty Images)

“Tommy” is slang for a soldier who served in the British Army. While the term’s origins are disputed, it was often associated with 19th-century soldiers and those who served in World War I. It’s during the latter period that the name saw its most frequent use. Over time, however, it’s fallen out of the common vernacular, and is now used as a way to show admiration and respect for those who fought in the Great War.

Legend states that, in the trenches, enemy troops would call out for Tommy across No Man’s Land, looking to speak with a British soldier.

Tommy Atkins

British "Tommies" sitting together
British soldiers having a scratch meal during the Second Boer War, 1901. (Photo Credit: Topical Press Agency / Getty Images)

The debate as to why and when British soldiers began being called “Tommy” has been ongoing. The Imperial War Museums found what seems to be the oldest written record of the name Tommy Atkins, in a letter dating back to 1743.

At the time, Jamaica was under British rule, and the red coats worn by the British had already earned them another nickname, “Thomas Lobsters.” The letter calling the soldiers “Tommy Atkins” was sent to the British War Office, to report a mutiny among mercenaries.

It read, “Except for those from N. America (mostly Irish papists) ye Marines and Tommy Atkins behaved splendidly.”

Did Thomas Atkins fight during the Flanders Campaign?

Portrait of Arthur Wellesley, 1st Duke of Wellington
Arthur Wellesley, 1st Duke of Wellington. (Photo Credit: Universal History Archive / Getty Images)

One of the more popular theories behind how Tommies got their nickname comes from Arthur Wellesley, 1st Duke of Wellington. Wellesley wouldn’t coin the nickname for British soldiers until later in life, but one serviceman, in particular, stuck with him long enough to inspire the term when the time came.

In 1794, Wellesley commanded the 33rd Regiment of Foot in the bloody hand-to-hand combat of the Battle of Boxtel. Following the fierce engagement, he walked through the battlefield and noticed the best man at arms, Pvt. Thomas Atkins, laying horribly wounded. When he approached, the soldier looked up at Wellesley and said, “It’s all right, sir, all in a day’s work.”

He died shortly after.
This apparently resonated with Wellesley. He mentioned the soldier’s name in 1843, when he supposedly suggested it become the moniker for a brave British serviceman.

Tommies littered the pages of infantry paperwork

British "Tommies" standing around a destroyed cottage
British soldiers around a destroyed cottage, 1918. (Photo Credit: National Library of Scotland / Wikimedia Commons / No Known Copyright Restrictions)

A theory that seems to disprove the one credited to Wellesley dates back to 1815. At that time, the British War Office was in search of a name that could function as both a generic term and placeholder on sample infantry paperwork. After some deliberation, “Tommy Atkins” was chosen.

When a recruit was unable to sign his name to his enlistment papers, he’d mark the page and have “Tommy Atkins” take the place of his own. To show how to properly fill out the form, the name was printed in every sample service detail of the Soldiers Account Book.

This theory has become the most widely-accepted among scholars as to how British soldiers came to be called Tommies.

Another ‘Tommy Atkins’ was famed for his bravery

British "Tommy" holding a doll
British soldier with the 51st Division during the German offensive in Lys, April 1918. (Photo Credit: John Warwick Brooke / Wikimedia Commons / Public Domain)

Whether or not their real names were Tommy Atkins, there were quite a few throughout history who earned notoriety for their bravery. One such case was a soldier involved in the Indian Rebellion of 1857.

The alleged Tommy Atkins was serving with the 32nd Regiment of Foot when the mutiny broke out. Committed to serving his country, he remained at his post, despite pleas from his comrades to accompany them in their retreat to the British Residency. He subsequently became overwhelmed by the attacking force and was killed.

This account wasn’t recorded until 1900, when British Army chaplain Rev. E.J. Hardy wrote about the rebellion. He explained that, “His name happened to be Tommy Atkins and so, throughout the Mutiny Campaign, when a daring deed was done, the doer was said to be ‘a regular Tommy Atkins.”

The time of Tommies has come to an end

Harry Patch holding a wreath at the beach
World War I veteran Harry Patch, October 2007. (Photo Credit: Matt Cardy / Getty Images)

As popular as Tommies were, the nickname has largely fallen out of use. Harry Patch became known as the “Last Tommy,” as he was the final surviving British trench combat soldier to have fought in WWI. He lived to the age of 111, and died in 2009. Now, only the private soldiers of British Army’s Parachute Regiment have a nickname that resembles the moniker: “Toms.”

The term has since found its way into other parts of the British Army. The Tommy Cooker was a portable, alcohol-fueled stove issued to British troops throughout the Great War. It was praised for its fuel source, which produced no visible smoke. However, it had a reputation for being unable to effectively heat food or water.

The term “Tommy Cooker” was even passed along, becoming a derogatory word used by German tankers for the American-built M4 Sherman, which was also operated by the British. The tank was problematic in that it often exploded into flames the moment it was hit by shells. Poor stowage was at fault, with ammunition being thrown on the floor for quick access.
Even the British troops adopted the mockery, nicknaming the M4 Shermans “Ronsons,” after the cigarette lighter company of the same name, whose slogan was “light first time – every time!”
Categories
World War 1

How the Soldier ‘Worth a Million Men’ Single-Handedly Saved His Comrades from a German Assault

On April 9, 1918, Aníbal Augusto Milhais and his comrades with the 2nd Infantry Division of the Portuguese Expeditionary Corps were embroiled in the intense Battle of the Lys. The bombs and artillery were unrelenting as Milhais lay in the second trench of the Allied line. He was shocked by what happened next, and the events that followed changed his life forever, proving just how fearless he was and making him Portugal’s greatest war hero.

Portugal’s unexpected role in the First World War

Portuguese soldiers crammed onto the deck of a ship
Portuguese soldiers departing for battle, 1916. (Photo Credit: Universal History Archive / Universal Images Group / Getty Images)

Not much is known about Aníbal Augusto Milhais’ early life, other than he was born on July 9, 1885 in northern Portugal. He was drafted into the Infantry of Bragança in the summer of 1915, and two years later deployed to France with the Trás os Montes Brigade, part of the 2nd Infantry Division of the Portuguese Expeditionary Corps.

Portugal’s role in World War I was different from other Allied forces. The country had initially remained neutral, but hostilities arose between it and Germany, due to U-boat activity in the Atlantic Ocean and Portugal’s wish to comply with British requests for aid. Things came to a head when Portugal seized German vessels at the country’s ports, leading Germany to declare war on March 9, 1916.

An unexpected attack by the Germans

Portuguese soldiers gathered together in a trench
Portuguese soldiers during the Battle of the Lys, 1918. (Photo Credit: João Carvalho / Wikimedia Commons / Public Domain)

In the months leading up to the Battle of the Lys, the 2nd Infantry Division was worn down by constant German bombardments and raids, contributing to casualties and extreme fatigue. The battle began on April 7, 1918, but everything came to a head in the early hours of April 9.

Aníbal Augusto Milhais settled in a dugout in the second trench along the Allied front, and he stayed low as the bombs and shells continued to pummel the area around him. Eventually, the heavy shelling subsided to nothing more than the sound of thunder in the distance – but Milhais knew there wasn’t a storm rolling in. He looked out from behind the trench, trying to see past the thick fog that settled over No Man’s Land.

All of the sudden, more explosions rained down just feet from the first trench. Milhais watched as his fellow soldiers dove into the front trench, wondering how so many men were retreating from behind enemy lines. Shots were fired inside the trench, and soon Milhais and the others in the second realized the approaching men weren’t Portuguese – they were Germans.
As more enemy troops crossed No Man’s Land, Milhais aimed his Lewis gun at the men in the second trench, who began to retreat to a supply one. Meanwhile, a group led by the infamous stormtroopers took the first trench and started toward the second through a network of smaller communication trenches.

Aníbal Augusto Milhais fought off a German advance on his own

Soldiers aiming their weapons while standing in a trench
Trench warfare during World War I. (Photo Credit: Bettmann / Getty Images)

As gunfire rang out, Aníbal Augusto Milhais ran through the trench system and leaped across a large hole to get to a road on the other side. Ducking behind a dirt wall, he found several soldiers hiding from the Germans, many of them without guns to defend themselves.

Enemy troops, armed with guns and bayonets, approached the group, and Milhais told the others to run to safety while he covered their retreat. His Lewis gun was superior to the German rifles and quickly decimated the approaching men, single-handedly stopping the German advance for a time.

As the Allies retreated, Milhais moved from side-to-side, firing from different positions and keeping the enemy soldiers stuck in the various holes and craters in which they were hiding. His movements made it appear to the Germans as though multiple gunmen were firing at them; the Portuguese soldier worked as quickly and efficiently as three gunners while fending off an entire force all on his own.

Aníbal Augusto Milhais found himself alone behind enemy lines

Destroyed tank along a muddy road
Destroyed tank on a devastated street corner in Belgium during the First World War. (Photo Credit: US Army / Interim Archives / Getty Images)

Aníbal Augusto Milhais ran out of ammunition and started moving beyond the trenches in search of escape. Eventually, he found an abandoned piece of canvas draped on the ground next to a dead horse. He covered himself with it before the enemy stormed past him in search of the retreating Portuguese.

After hours spent hiding, Milhais emerged and found himself totally alone behind enemy lines. He dashed across the open field and into the cover of a nearby forest, making his way back toward Allied lines. While traveling, he found an unharmed Scottish major stuck in a swamp. Milhais rescued him, and the two men continued back to the frontlines together.

Three days after the battle began, the two finally made it back to their units.

The soldier ‘worth a million men’

Aníbal Augusto Milhais sitting with five other Portuguese soldiers
Aníbal Augusto Milhais (center) with his fellow Portuguese soldiers. (Photo Credit: Unknown Author / Wikimedia Commons / Public Domain)

Throughout the remainder of the First World War, Aníbal Augusto Milhais continued to fight with honor and distinction, at one point laying down suppressive fire to allow a Belgian unit to make it to a secondary trench without any casualties. For his actions, he was awarded Portugal’s highest military distinction, the Order of the Tower and of the Sword, of Valour, Loyalty and Merit, as well as the French Légion d’Honneur, presented to him on the battlefield in front of 15,000 Allied soldiers.

He was even affectionately known as the soldier “worth a million men.”

Milhais returned to his home village a hero, married and had nine children. The family eventually fell on hard times, and when he asked the government for support, he wasn’t given monetary aid. Instead, his village was renamed for him. After traveling to Brazil in search of a better life and receiving support from those living there, he returned to Portugal, where he remained until his death in 1970.
Categories
World War 1

17 Powerful Images That Show the Human Side of War

Since the First World War, every conflict has been well-documented. There are millions of photos showing soldiers, aircraft, tanks and battlefields, and behind them are the humans tasked with fighting. Every combatant and civilian alike is someone who has friends, a family and a story. The following photos show those behind conflict – their pain, their joy, their humanity – and provide a look into the human side of war.

Toboggan time

Two women with the Auxiliary Territorial Service (ATS) riding a toboggan down a snowy hill
Photo Credit: Keystone / Getty Images

The Auxiliary Territorial Service (ATS) was the female branch of the British Army during the Second World War. They took on a number of different roles, including serving on the frontlines in various capacities. This photo, captured in January 1942, shows two members taking a quick break from their work to enjoy tobogganing in the snow at one of the London’s gun sites.

Comforting a comrade

Tolbert Raymond Winchester comforting another soldier
Photo Credit: Sergeant First Class Al Chang / US Army / Wikimedia Commons / Public Domain

This photo was taken on August 28, 1950, during the Korean War. In the Haktong-ni area, an American soldier is comforted by another while grieving the death of his friend, who was killed in action (KIA). The man holding him has since been identified as Tolbert Raymond Winchester.

The scene is made all the more heartbreaking by the corpsman in the background, who’s filling out casualty tags. This is a human side of war most don’t picture (or see) when they think of armed conflict.

She said ‘yes’

Pfc. Patrick J. Carr reading a letter
Photo Credit: Bettmann / Getty Images

This photo of Marine Pfc. Patrick J. Carr was taken just four days before the end of the Battle of Okinawa, one of the largest altercations in the Pacific Theater during the Second World War. Carr was stationed there when he received a letter from his sweetheart, Stella Norek, who agreed to marry him.

Her portrait was placed inside his helmet while he jubilantly read over her words.

A father saying goodbye to his son

Marines paying their respect to Pfc. Mike Fenton, whose body is draped in the American flag
Photo Credit: USMC Archives / US Marine Corps / Flickr CC BY 2.0

Pfc. Mike Fenton was also stationed on Okinawa during the Second World War. However, the conflict didn’t end happily for him. This photo was taken at his burial in May 1945, after he was killed in a Japanese counterattack on the road to Shuri. Alongside the officers and friends who stand vigil is his father, Marine Col. Francis I. Fenton, who prays at the foot of his son’s grave.

It’s one thing to know death occurs during war, but it’s another to see the raw, human emotion that comes from the other side – those who were lucky enough to survive.

Mail delivery

Soldier carrying packages and letters
Photo Credit: Historica Graphica Collection / Heritage Images / Getty Images

The Battle of the Somme during the First World War was one of the bloodiest battles in human history. The British lost 420,000 men, while Germany lost 450,000.

You wouldn’t know just how bad things were by looking at this photo, taken in 1916. This soldier smiles broadly as he collects the recently-arrived postal delivery for his battery, located near Aveluy. Letters from home played a major role in troop morale during the war.

Miss. Hap

Sgt. Frank Praytor feeding Miss. Hap with an eyedropper
Photo Credit: Sergeant Martin Riley / Getty Images

Somehow, this small kitten managed to survive a heavy mortar barrage near Bunker Hill, once the site of a major Korean War engagement in 1952. Marine Sgt. Frank Praytor found the two-week-old animal in 1953, after her mother had been killed.

This photo was taken while Praytor fed her canned milk out of a medicine dropper. He ultimately decided to adopt the kitten. He named her Miss. Hap because “she was born at the wrong place at the wrong time.”

Wise cracks

American soldiers walking past a group of women in bathing suits
Photo Credit: Mirrorpix / Getty Images

Away from the frontlines and the horrors of war, a group of very happy soldiers chat with female war workers in August 1943. Both groups are on vacation at the War Workers Holiday Camp at Cookham, Berkshire, United Kingdom.

Child soldier

Hans-Georg crying
15-year-old Hans-Georg Henke cries tears of defeat after being captured by the US Ninth Army in Germany, April 1945. (Photo Credit: John Florea / Keystone / Getty Images)

This photo of Hans-Georg Henke is arguably one of the most famous photos of the Second World War and shows the human side of being captured by the enemy.

When it was taken in April 3, 1945, he was only 15 years old and had just been captured in Germany. His own account states he’d been captured by the Red Army and was crying because the life he knew was falling apart. The photographer insists, however, that he was actually a prisoner of the US Ninth Army and his emotions were the result of combat shock.

Here comes Santa Claus

Leading Aircraftman Fred Fazan dressed as Santa Claus, handing out presents to children
Photo Credit: Royal Air Force Official Photographer N.S. Clark / Imperial War Museums / Wikimedia Commons / Public Domain

Taken on December 13, 1944, this photo captures Leading Aircraftman Fred Fazan dressed as Santa Claus, delivering presents to Dutch children at Volkel Air Base. The Royal Air Force (RAF) No. 122 Wing, who operated their Hawker Typhoons and Tempests out of this location in 1944, saved their candy rations and money to put on a Christmas party for the children.

According to photographer N.S. Clark, Santa was afraid of Messerschmitts, so chose to arrive via Tempest.

Christmas in Egypt

Peter Gallagher, John Dean, Jim Read, Jack Allen, Jim Highton, Manuel Armario and Reg Bomson decorating a Christmas tree
Photo Credit: Hulton-Deutsch Collection / CORBIS / Getty Images

British troops were sent to Egypt during the Suez Crisis. After the United States and UK decided not to help pay for the Aswan High Dam, Egyptian President Gamal Abdel Nasser declared martial law in the area around the Suez Canal, prompting the UK, Israel and France to intervene.

This group – Peter Gallagher, John Dean, Jim Read, Jack Allen, Jim Highton, Manuel Armario and Reg Bomson – can be seen here decorating their Christmas tree while stationed in the country.

Worldly possessions

Woman crying while sitting on the side of a road
Photo Credit: Mirrorpix / Getty Images

At the beginning of the First World War, Germany invaded Antwerp. Within a few weeks, the Belgian forces withdrew from the city. This photo shows a woman sitting along the side of the road, beside a small table, some kitchen pots and a statue – all her worldly treasures. The image is dated 1914, meaning it’s likely she lost her home during the invasion.

Boys will be boys

South African soldiers running around with their comrades on their backs
Photo Credit: Topical Press Agency / Getty Images

Even war can’t stop boys from getting up to shenanigans.

This photo was taken of South African soldiers stationed in Bexhill-on-Sea, United Kingdom in October 1915. While their fellow troops watch on, a group of them can be seen playing what one can only assume is “get on your friend’s back and whack another team with a broom” – or, better yet, “whack them until they fall off.”

Nothing remains

German soldier sitting on a brick wall, crying
Photo: Tony Vaccaro / Getty Images

Taken by renowned World War II photographer Tony Vaccaro, this image captures the return of a German soldier to Frankfurt in March 1947. He was taken as a prisoner of war (POW) by the US during the war and released after it came to an end.

When the man arrived home, excited to see his family, he discovered his house had been reduced to rubble, and that his wife and children were all dead. In Vaccaro’s own words, “He gave up […] That’s why I call this the defeated soldier.”

Team building

Italian soldiers kneeling together in the grass
Photo Credit: Museo Centrale del Risorgimento / Mondadori / Getty Images

For those who think team building exercises are an invention of the modern workplace, think again. This photo of soldiers with the Italian Army was taken in 1917, as they engaged in some form of team building game. The original caption indicates they’re men of the “Emilia Brigade,” the 119th and 120th Infantry Regiment.

Helping hand(s)

Soldier leaning out of the bed of a truck to kiss his girlfriend while his comrades watch
Photo Credit: Bettmann / Getty Images

The identities of those in this photo, their nationalities and their location remain a complete mystery. What is known, however, is that the image was taken in 1940. However, these questions add to the humanity of the moment – completely spontaneous on the part of the woman, soldier and photographer.

With the help of his unit holding him in the truckbed, this soldier gets a goodbye kiss before leaving for… Somewhere.

Contemplation

Soldier sitting with his hands over his face
Photo Credit: Bettmann / Getty Images

Taken on January 8, 1966, this photo shows an American soldier following Operation Marauder, a join engagement of the US 173rd Airborne Brigade, the 1st Battalion of the Royal Australian Regiment and the 161 Bty of the Royal New Zealand Artillery during  the Vietnam War.

Exhausted from the intense fighting, the serviceman simply sits with his head in his hands and stares into space, contemplating what just happened.

Proper motivation

Soldiers with their arms out, while their commander hits one with a plank
Photo Credit: Fox Photos / Getty Images
Men with the British Army undergoing overseas training in Hertfordshire, UK on August 6, 1939.
It’s unclear just how effective this activity was, although it certainly brought smiles and laughter to the men. Their sergeant took to carrying a large plank, which he used to smack them – in good spirit – to help them jump and stay warm.
Categories
World War 1

The Allies Crafted the Largest Non-Nuclear Explosion to Win the Battle of Messines

The origin of mine warfare dates back all the way to the mid-19th century, during the American Civil War. In December 1861, Confederate officer Maj. Gen. Leonidas K. Polk oversaw several men as they loaded explosives into iron containers and buried them along two routes leading into Columbus, Ohio.

Luckily, the Union soldiers discovered the cache of explosives and dismantled them before they were detonated, but Polk and others had become infatuated with the idea of using mines to sway the outcome of the conflict in their favor. Half a century later, landmines took on a whole new level of lethality during the First World War and, in particular, the Battle of Messines.

Planting Allied landmines along Messines Ridge

Sappers and miners digging into the ground
Sappers and miners digging under Hill 60, south of Ypres, Belgium. (Photo Credit: The Print Collector / Getty Images)
The area of Ypres, Belgium saw some of the most prolific battles of the First World War. and it’s where mining really took shape. The Germans first captured Messines Ridge in 1914, which afforded them a high-point to clearly observe Allied movements. After suffering heavy casualties, the Allies began mining against German-held areas in West Flanders. Explosives were placed 15-20 feet below the surface, beneath the enemy territory.
The galleries were supposed to be over 1,000 yards long, but the longest wound up being only 720 yards in length. The men charged with digging them served as part of “tunneling companies” – soldiers recruited for their excavation skills – and faced harsh conditions, including struggles with groundwater and other geological setbacks.
After months of digging, the BEF’s tunnel system was complete. The miners filled the galleries with 454 tons of ammonal and gun cotton, while several mines were placed throughout the Messines. The largest were located at St. Eloi, loaded with 95,600 pounds of ammonal divided between two locations: Maedelstede Farm and Spanbroekmolen, the highest points in the area.

German forces came within meters of Allied mines

Two women examining an Electric Contact (EC) mine
Two women check an Electric Contact (EC) mine, 1918. (Photo Credit: G.P. Lewis / Imperial War Museums / Getty Images)

The Germans were also digging their own network of tunnels – in fact, one came within meters of the British mine chambers. They also unearthed a mine at La Petite Douve Farm well before the Battle of Messines began.

The Germans weren’t totally oblivious to the Allies’ mine plans, as spies and air-based reconnaissance had picked up on the heavy activity around Messines Ridge. They were also aware that the Allies were planning to use the mines as part of a ground-level attack. After debating leaving the area lined with mines, they decided an assault wasn’t imminent. If one happened to occur, they were confident enough in their defenses, even though some officers wanted to retire to a safer location.

Battle of Messines and the boom heard across Europe

Men standing along the ridge of a 45-meter-deep crater
Forty-five-meter-deep crater created by the explosions at the Battle of Messines, 1917. (Photo Credit: Fernand Cuville / Wikimedia Commons / Public Domain)

Just before dawn on June 7, 1917, British artillery halted as the sound of nightingales singing broke through the silence of the battlefield. At 3:10 AM, the mines along the Messines were all fired within 20 seconds of each other, creating a massive boom as the largest non-nuclear explosion tore through German territory.

Some even suggested it was the loudest man-made sound in history, supposedly heard as far as London and Dublin.

“The German troops were stunned, dazed, and horror-stricken if they were not killed outright,” recalled journalist Philip Gibbs. “Many of them lay dead in the great craters opened by the mines.” The explosion was deadly, killing as many as 10,000 German soldiers between Ypres and Ploegstreert.
The troops from the United Kingdom, Canada, Australia, Ireland and New Zealand completed most of their objectives within hours of the battle’s commencement, capturing 7,000 German soldiers and allowing the Allies to retake Messines Ridge.
The Allies had created 26 mines and all but seven were set off, resulting in the detonation of one million pounds of explosives. The months of work and meticulous preparation ultimately paid off with very few losses. Messines is still regarded today as one of the major contributors toward the Allied victory in World War I.